RV-9A: Right Wing Prep - 12/15/2006
Home Previous Entry Next Entry Back |
Share on:

|
|
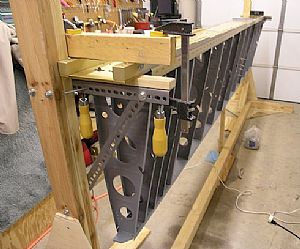 Put the right wing spar/rib assembly on the wing jig Put the right wing spar/rib assembly on the wing jig
Before I put the spar/rib assembly on, I made sure that the jig arms were level. I put shims under it where it needed leveling. Then I got my caulk gun and shot some Liquid Nails under the base to glue the jig to the concrete floor of the garage. I am going to make damn sure this thing doesn't go scooting around the garage floor while I'm riveting on it.
|
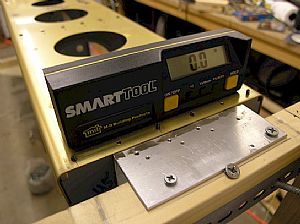 Attached the aluminum angle support on the outboard end Attached the aluminum angle support on the outboard end
I removed this piece of aluminum angle from the left wing and fitted it on the right wing. When I mounted the spar/rib assembly on the jig, I put one screw in solidly on one of the angle and then put in the other screw slowly, making sure that when it was tight, everything would be level, and it was.
|
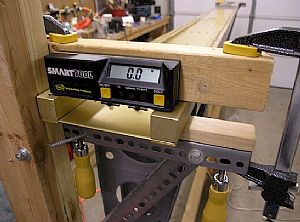 Leveled the inboard end Leveled the inboard end
I grabbed a scrap 2x3 and put it over the spar and clamped it down on each end, screwing each end down slowly until the level read zero.
|
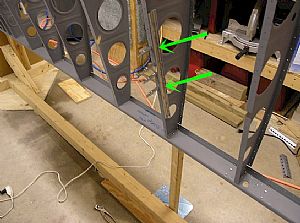 Taking the sag out of the main spar Taking the sag out of the main spar
The spars have a cutout in them on one side to allow room for a long "J" stringer that runs horizontal under the top skin, providing additional strength for the skin. Unfortunately this cutout allow the ribs to bend when you put the center support under the rear spar. So I took some scrap angle aluminum and drilled holes into it and clecoed it to one of the spars over the "J" stringer gap.
|
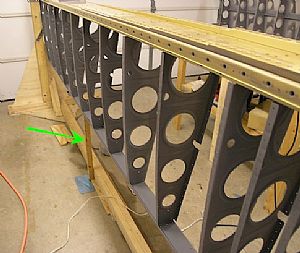 Put in the center support stiff leg Put in the center support stiff leg
I got a scrap 2x2 and began cutting it to the desired length that made the nylon string line on the main spar above, line up on the rivet holes that run all the way down the spar. Now everything on the main spar is level and straight. Ready for them skins.
|
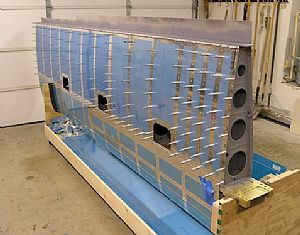 Clecoed the bottom skins on to the left wing Clecoed the bottom skins on to the left wing
In order to get to the right wing skins, I needed to get the left wing skins out of the way. I also needed to check the fit of the bottom skins on the left wing. The fit is perfect!
|
Home Previous Entry Next Entry Back
|


