RV-9A: Rudder - 11/2/2005
Home Previous Entry Next Entry Back |
Share on:

|
|
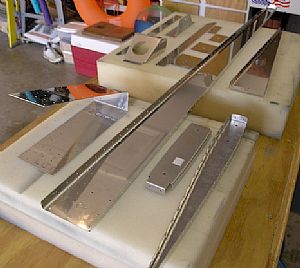
 Trimmed and clecoed on rudder brace Trimmed and clecoed on rudder brace
The R-710 rudder brace has to have two sides trimmed off in order to fit on the bottom of the rudder. It has small predrilled holes in it used to "connect the dots" for the cutting lines. I cut the excess off leaving half of the original predrilled holes in place. If I would have made the cuts to where the holes where gone, the brace would have been too short for the drilling of the skin holes into the sides of the brace. The plans do not mention the final drilling of the side #40 holes from the skin. However, the drawing shows a larger rivet needed to fasten the skin to the bottom rib and the R-710 rudder brace.
|
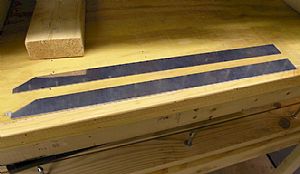 Cutout the R-918 rudder bottom strips Cutout the R-918 rudder bottom strips
Made these strips out of a long piece of 1 1/8" wide aluminum strip that comes with the kit.
|
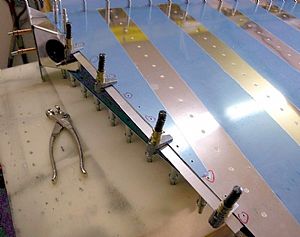 Clamped on first R-918 bottom strip Clamped on first R-918 bottom strip
Most of the clecos that hold the skin to the bottom rib had to be taken out to allow the clamping on of the strip. I will need to make sure the holes line up before final drilling the skin/rib into the strip.
|
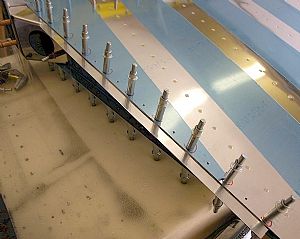 Final drilled R-918 bottom strips to rudder Final drilled R-918 bottom strips to rudder
Using side grips to hold the strip on, I final drilled the bottom strips, putting in a cleco in every other hole as I drilled. I soon learned to drill as fast as possible at high speed, to prevent making the skin hole any wider than it already is. I need more side grips.
|
 Disassembled the rudder Disassembled the rudder
Time for deburring, dimpling and sanding.
|
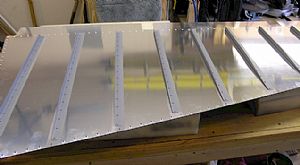 Deburred and dimpled the rudder skins Deburred and dimpled the rudder skins
I used my new 4" inch yoke with the Avery rivet squeezer to dimple the holes that set far in on the forward edge. You'll notice that there is a find dusting of primer on the skin under each stiffener, to insure that both surfaces are protected when riveted together.
|
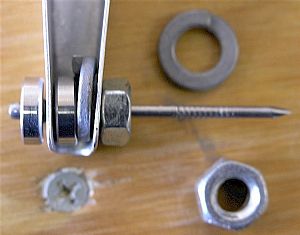 More praise of the Avery Pop-Rivet dimpler More praise of the Avery Pop-Rivet dimpler
I started dimpling the holes in the top rib of the rudder with the rivet squeezer. Then when it wouldn't fit any more, I switched to the Avery vise grip dimplers. I got to the last rivet hole and couldn't get anything to fit. So after about 30 minutes of scratching my head, I decided to use the Avery pop-rivet dimplers to get the last hole. I put the nail of the dimpler set through the male dimpler, then through the rib hole, then female dimpler, then through a large lock washer, then through the other rib hole, and then capped off everything with a over-sized nut. After squeezing the dimple, I reversed the process for the other side. The large lock washer encircled the first rib dimple, preventing it from being smashed flat from the second dimpling. Time for a victory beer.
|
Home Previous Entry Next Entry Back
|


