RV-9A: Rudder - 11/7/2005
Home Previous Entry Next Entry Back |
Share on:

|
|
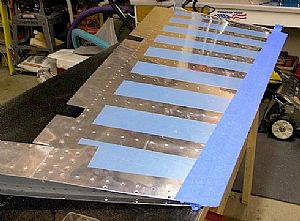 Ready to rivet the rudder trailing edge Ready to rivet the rudder trailing edge
Well, here it is. Make it or break it. I decided to go with Van's instructions all the way on this trailing edge construction, except for one thing. I used a large, heavy piece of steel angle to use as a back rivet plate. This monster piece of steel was going to insure a straight rudder edge (or so I hoped). I removed the aluminum angle and put flat head rivets in every dimpled hole. Then I covered the rivet heads with painters tape (didn't have any riveting tape). Update 12/28/2008: Here's the tape I should have used for holding the trailing edge rivets in place, Scotch� Removable Magic� 811 Tape.
|
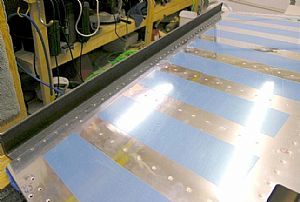 Set the taped side down on the Steel angle Set the taped side down on the Steel angle
I screwed an 1" x 3" piece of scrap wood along the edge of the work bench to keep the steel angle from falling off the table and landing on my big toe. I put some 1/4" plywood under the rudder to bring it up to the same height as the steel angle. Then I back riveted the rivets as instructed in Vans instruction manual, being careful to watch for any warping as I riveted.
|
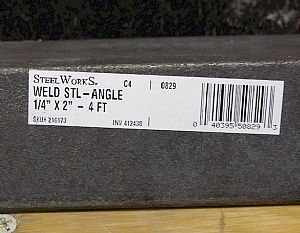 Label on the Steel angle Label on the Steel angle
Both Lowes and Home Depot carry this heavy steel stuff.
|
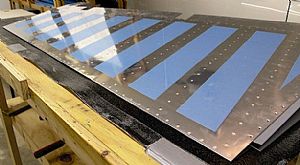 Final product - Straight as an arrow! Final product - Straight as an arrow!
After I back riveted the rivets, I flipped the rudder over, putting the back-riveted section on top of the piece of steel angle, I then final riveted the flat heads with a mushroom riveter, which finished flattening the back-riveted rivets into the dimples on the back side. Phew! Glad this is done! It wasn't as bad as I thought it would be.
|
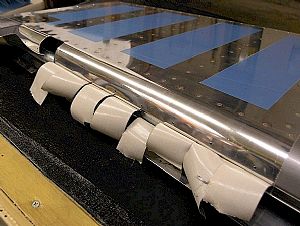 While I'm on a roll, might as well do the roll While I'm on a roll, might as well do the roll
I figured that the RV gods must be with me, so I decided to finish this dude now. I was so wrapped in getting the roller rod tapped on and prepped that I forgot to take a picture of it. I used a 6 foot piece of 1 inch electrical conduit for the roll rod. It took quite a while to duct tape the rudder skin to the conduit. The roll went fairly fast and I was suprised at the amount of force I had to use to bend that puppy. I was very happy with the results as I removed the tape.
|
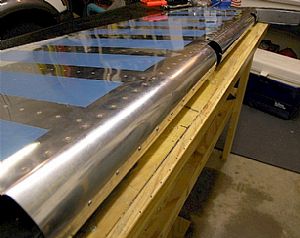
 Clecoed the skin together after the roll Clecoed the skin together after the roll
The top (small end) was easy to cleco together. The middle section made me holler a few explicatives, but I managed to cleco it together. The bottom.... well, forced me to grab my closest neighbor and give him a quick lesson on how to put in a cleco. I started at the top of the bottom section, pushing the edges together as my neighbor put in the clecos. We worked our way down until it was all clecoed. Then it was a matter of starting at the bottom, drilling out the holes, putting in pop-rivets and working my way to the top. The instructions say to make sure the pop-rivet is all the way in the hole before setting it. Part 2 of this should have said to also make sure that the pop-rivet is sitting flat on the skin all the around the rivet head. The pop-rivet sets itself in whatever position you put it in.
|
 Finished the Rudder! Finished the Rudder!
Phew! Time for a victory beer!
|
Home Previous Entry Next Entry Back
|


