RV-9A: Left Fuel Tank - 6/4/2006
Home Previous Entry Next Entry Back |
Share on:

|
|
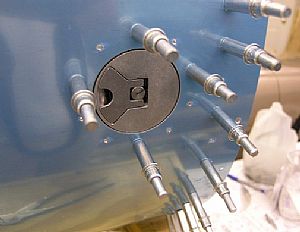 Final drilled the gas cap flange Final drilled the gas cap flange
I final drilled the T-406B fuel cap flange, using the cap in the cap flange as a guide for centering the flange in the tank skin opening. The cap flange has two slight bends in it to help it to conform to the curve of the tank skin. I drew lines on the flange with a sharpie to help me make sure that the bends were in the right position for drilling. UPDATE 8/21/2006: I was going to change out the gas cap for a different one that has a key lock on it, but NOOO. I found that if you want the locking gas cap, you have to order the whole kit and install a different fuel cap flange. Oh well, I'll get it right on the next RV.
|
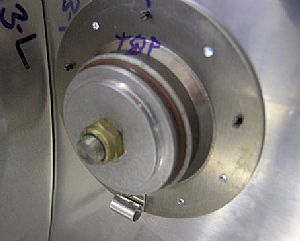
 Countersunk the gas cap flange Countersunk the gas cap flange
I removed the gas cap from the flange and countersunk the holes for the dimples that will go in the tank skin. I used my dimpled piece scrap skin to check the depth of the countersinks.
|
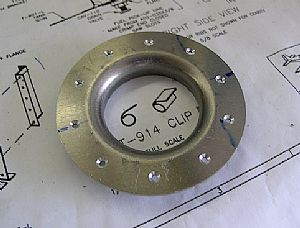
 Made the T-914 clip Made the T-914 clip
I made the T-914 clip from a scrap piece of aluminum and drilled it for installation sharing one of the cap flange rivets. Here I'm checking the fit. The instructions don't really say how to make the clip. So I cut a 2-3 inch piece of sheet aluminum from the scrap bundle, a half inch side. After deburring the edges, I duct-taped one end of the scrap piece to the shank of a normal sized screw driver and bent the scrap piece around it. Then I compared my clip to the drawing and cut of the end of it to match the drawing.
|
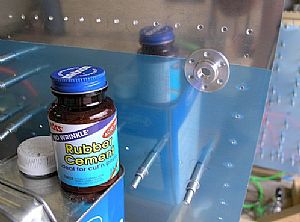 Started work on the VA-112 drain flange Started work on the VA-112 drain flange
It's kind of tough to get this small piece in line with the hole in the skin. You can't stick your head in the tank and you can't see the skin from inside the drain flange hole from the outside. So I bought some rubber cement from Office Depot and temporarily glued the flange into position using a hand mirror from the inside to position it correctly over the hole. After a few minutes of letting the cement dry, I final drilled the holes in the tank skin, using the flange holes as a guide. The rubber cement held things in place just well enough to allow me to only use a couple of fingers to hold the flange in place for the drilling. Then I pulled the flange off and simply rubbed the cement off with my fingers. It comes off very easily. On the other tank, I will remove the blue stuff first. The cement has a tendency to dissolve the blue stuff.
|
Home Previous Entry Next Entry Back
|


