RV-9A: Left Fuel Tank - 6/23/2006
Home Previous Entry Next Entry Back |
Share on:

|
|
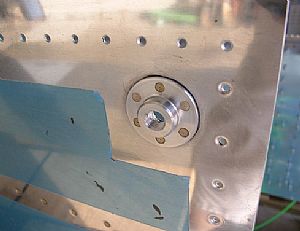 Riveted on the VA-112 drain flange Riveted on the VA-112 drain flange
What a mess, or I guess I should have said "you should have seen the mess!". I mixed up another 22 cc batch of the black goo and applied a layer of it on to the back of the drain flange. Then I clecoed the flange on to the tank skin. I pushed the rivets into the holes one at a time and squeezed them in place with my 4 inch yoke and hand sqeezer. The excess black goo shot out everywhere, kind of like walking barefoot in the cow pasture, with the undetected cow patties oozing out between your toes. I cleaned off the excess proseal on the outside of the tank with a multitude of paper towels with laquer thinner on them. I made sure that the papers towel didn't have too much laquer thinner on them. I didn't want to mess up the proseal under the flange. Yuck!
|
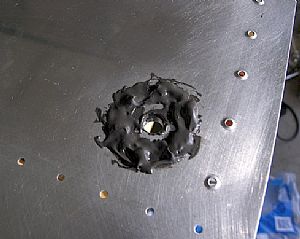 Shot of the back side of the drain flange Shot of the back side of the drain flange
I put a glob of proseal over the rivets just like I did on the tank stiffeners. There was also a huge glob of proseal inside the flange that had to come out. I rolled up a paper towel and put laquer thinner on it and put it through the flange hole on the outside of the tank skin. Then I pulled it through the flange hole from the inside. This pretty much cleaned out the preseal from inside.
|
 Riveted on the T-406B fuel cap flange and T-914 clip Riveted on the T-406B fuel cap flange and T-914 clip
This made quite a mess as well. I put the rivets in place on the skin, held by some rivet tape. Then I layed the skin down on the back rivet plate. I put a layer of proseal on the fuel cap flange and pushed it onto the rivets in the skin, forcing the black goo out around the edges. I left one rivet out, because I knew that I would use my hand squeezer to put the last rivet in that holds the T-914 curl clip. I back-riveted everthing down, making sure that the curve of the cap flange was down flat on the back-rivet plate. When I got it all riveted, everything in sight looked a murder scene, except the blood was black. The back rivet board was total gooey mess. Once again, I took some paper towels with laquer thinner and started cleaning away. I made sure that I forced some of the proseal inside the flange, where it met the top tank skin.
|
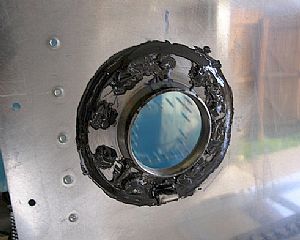 Here's a shot of the back of the T-406B fuel cap flange Here's a shot of the back of the T-406B fuel cap flange
This part was easy. All I had to do was get the popsicle stick and start spreading the joy. As before, I put a healthy glob of proseal on the rivets. Then I removed the tape that surrounded the flange.
|
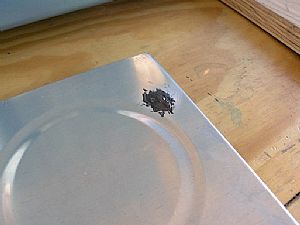 Plugged the hole in the outboard T-903 end rib Plugged the hole in the outboard T-903 end rib
I don't why this hole is here, but it needs to get plugged. The instructions gave me the choice of creating a cover plate to rivet on or squeezing a really large rivet into the hole. It just so happens that I have a "bucket o' rivets" that I got from another builder that has already completed his RV. I found the perfect size rivet in the bucket and squeezed it into the hole. I made sure that the hole already had some proseal in it before the squeeze. Then I put an extra dab of black goo on top of the rivet, on both sides. This, my friends, is why some builders prefer quickbuild wings.
|
Home Previous Entry Next Entry Back
|


