RV-9A: Left Wing Skins - 10/19/2006
Home Previous Entry Next Entry Back |
Share on:

|
|
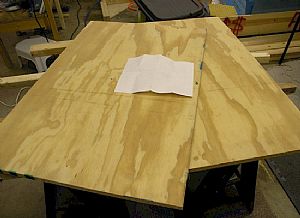 Putting the wing cradle together Putting the wing cradle together
While I'm waiting to find a day when both my rivet bucking buddy and I have a evening free for riveting the wing skins, I've decided to build the wing cradle. First, I took a long look at the wing cradle plans on Drawing #15 that came with the wing kit. I already had some 3/4" CD plywood sheeting in my garage. I cut out two pieces, both 2 by 3 feet. I just used my circular saw and an aluminum straight edge to make the cuts.
|
 Cut the 2 lower supports Cut the 2 lower supports
I cut two 2x4 supports, both 3 feet long and screwed them to the bottom of the two plywood sheets.
|
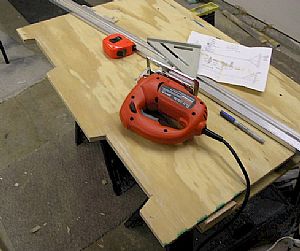 Made the cutouts for the wing spar Made the cutouts for the wing spar
I used my variable speed jig saw to cut out the 2 insets in the plywood where the wing spar will rest. The cuts are 1 1/2" deep. The width of the bottom of the cut is the same as the width of the spar, plus a quarter inch on each side, to allow room for the carpet that will go over the cutout. The outer cuts are at a slight angle to allow easy removal of the wing spar. Each cutout is 4 inches from the outer edge of the plywood.
|
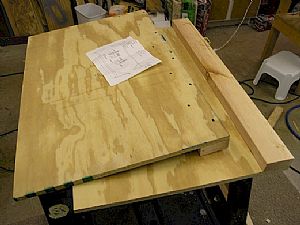
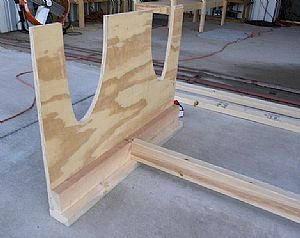
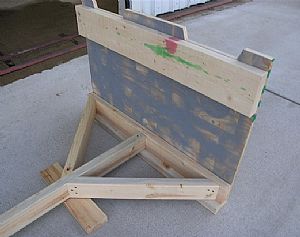
 Attached a 2x6 support under the cutouts Attached a 2x6 support under the cutouts
The plans show a slight cutout of the 2x6 to match the lower half of the plywood cutouts. I my opinion, making these thick cutouts on a 2x6 with an ordinary jig saw is just plain nuts. Instead, I just positioned the 2x6 to where the top edge of it was flush with the bottom of the plywood cutouts. I will go back later and put some short 1x2's on top of the edge of the 2x6 on each side of the cutouts, to insure the hold on the wing spar.
|
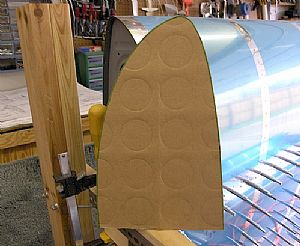 Created a wing leading edge pattern Created a wing leading edge pattern
I got a coke case box and cut out the bottom of the box. Then I traced the leading edge of the wing onto the cardboard. It�s the same height as the ribs inside the leading edge.
|
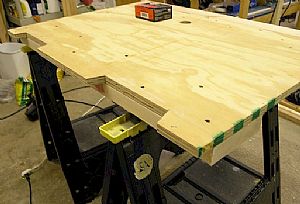
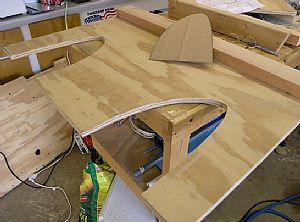 Made the leading edge cutouts Made the leading edge cutouts
I marked the cutouts onto the plywood by tracing around the edge of the leading edge pattern. Each cutout is also 4 inches from the outer edge of the plywood, just like the spar cutouts mentioned above. Then I put a new blade in my jig saw and made the cuts, making sure to cut outside the lines to make additional room for the rubber matting that I will put in later. If I had decided to use regular carpet, I probably would have added an additional quarter inch to the outside of the pattern to allow for the thickness of the carpet. You�ll also notice that the cutouts force placement of the wings "bottom side out", so I can still work on the wings while they are in the cradle.
|
 Hauled everything to the hangar Hauled everything to the hangar
Time for assembly! I cut two more 3 foot 2x4's and screwed them to the bottom of each plywood pieces. I will attach some wheels to the bottom of these 2x4�s later. They also help line things up when putting in the main 2x4 support and angle braces. Then I cut the main support beam from a 10 foot 2x4, making it 8 feet, 7 1/2 inches long, which connects the two plywood ends together. The plans call for the cradle to be approximately 9 feet long. So I subtracted the width of the 2 2x4's and the 2 plywood ends to come up with the 8 foot 7 1/2 inch measurement for the support beam. (NOTE: If you building an RV7 or RV8, the main support beam 2x4 is one foot shorter.) I put in 2 long wood screws through the back of the plywood into the 2x4 main support, to hold everything together.
|
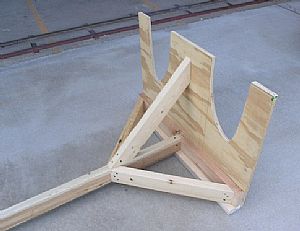 Made the angle supports Made the angle supports
Here�s where a compound miter power saw is indeed a necessity. It makes cutting these 45 degree angles a breeze. I cut two 2x4�s, 23 inches long (outer edge to outer edge) for the 2 bottom angle braces, and one 2x4, 25 inches long (outer edge to outer edge) for the top angle brace. Then it was just a matter of screwing it all together with my electric drill, with a Phillips screw driver bit. I used my framing square to make sure that the plywood was lined up at a 90 degree to the main 2x4 support before screwing in the first bottom brace.
|
 Same thing on the other end Same thing on the other end
The lengths for the bottom braces were the same as the other end. The top brace is not installed yet on this picture. I had to use my cognitive abilities (arr-arr) to determine the length of the top angle brace. I forgot to write down the length of the top brace after I installed it (sorry bout� that). Can you tell that I used this piece of plywood as a backdrop for priming plane parts?
|
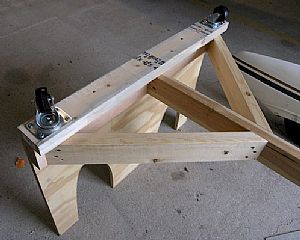 Time for wheels! Time for wheels!
I bought 4, 2 1/2 inch full castering wheels to put on the bottom of the wing cradle. I used some very large 1 1/2 inch wood screws to attach them to the bottom 2x4�s. To make sure that the wood wouldn�t split when I screwed the wheels on, I drilled holes (smaller than the diameter of the screws) into the wood.
|
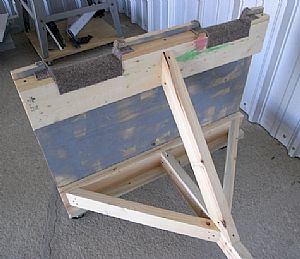 Carpet time Carpet time
On the wing spar end of the cradle, I cut some short 1x2's and screwed them to the top of the 2x6, just to help define the cutouts where the wings spar sits. Then I cut 2 hunks of old carpet, about 5 inches wide and stapled them to the wing cradle around the edges of the carpet, making sure that none of the staples would ever touch the wing spar. On the other end of the cradle, I used that rubber stuff that you put under your living room throw rugs, as the cush for the leading edge of the wing. It will provide enough cush to protect the surface of the wing, while also preventing it from scooting around on the cradle.
|
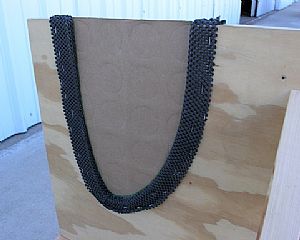 Put rubber matting on the leading edge cutouts Put rubber matting on the leading edge cutouts
I cut two long strips of the black rubber matting about 5 inches wide and stapled them into position. Just to make sure that the wing would fit OK, I stuck my wing pattern inside the cutout. Looks good. If I had used regular carpet instead of the thin rubber matting, I would have added an additional quarter inch to my cutout to allow for the thickness of the carpet.
|
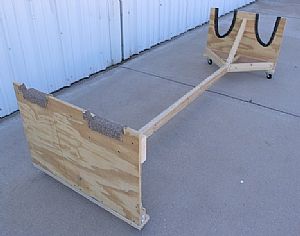 Thar' tis... Thar' tis...
One wing cradle, ready for loadin'!
|
 Power tools Power tools
You don't need expsensive tools to build the jig. Almost all of these power tools are fairly cheap. BE CAREFUL! You'll need those fingers to check your hemorrhoids when you get old!
|
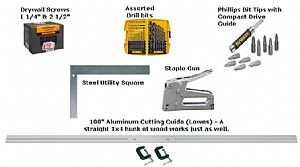 Other goodies Other goodies
These items are also helpful. Just click on the picture shown left for a better view.
|
Home Previous Entry Next Entry Back
|


