RV-9A: Left Wing Skins - 11/11/2006
Home Previous Entry Next Entry Back |
Share on:

|
|
 I'm back!! I'm back!!
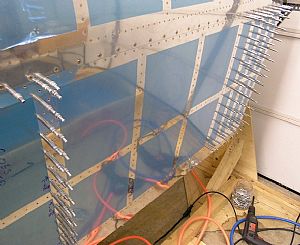
It's been tough to get my schedule and my bucking buddy's schedule together to where we can rivet the skins. I have a good portion of the inboard skin riveted. I am using a combination of riveting techniques such the old mushroom head and bucking bar, the new offset backrivet set and bucking bar, and my 4 inch yoke on the hand squeezer. All this was done with the wing on the jig. Last night I decided to train my 11 year old son on how rivet and buck on one row of rivets and it turned out really nice! Hopefully things will now pick up a bit.
Update 5/6/2007: Check out the right wing skins page. I decided to not use the offset backrivet set and instead chose to use my rivet gun with the swivel mushroom head and the bucking bar from behind, which is the suggested method in the Orndorff videos. The right wing skins turned out much nicer the left wing. The swivel mushroom head is a lot more forgiving than the fixed mushroom head. It allows me be off a little without dinging the sheet metal.
|
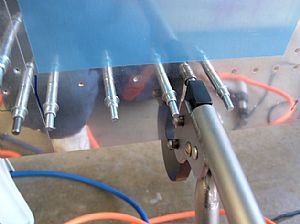
 Started on the inboard skin center ribs first Started on the inboard skin center ribs first
Using the offset backrivet set, I started in the middle of the rib and worked my way up and down, till I got them all in from top to bottom. The weird thing about this offset backrivet set is that I couldn't hold on the rivet at a perfect 90 degree, the rivet would go off to one side. I found that I had to lean the set towards to the rib at an angle in order to get a perfect rivet. Go figure that one. I also had to set the pressure at 60 lbs to make it work right.
|
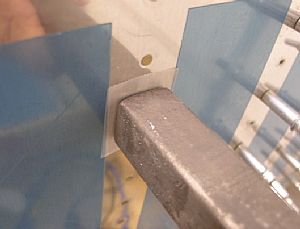 On the flip side On the flip side
While I backriveted, my bucking bar buddy held the rivet in place with a bucking bar, making sure to hold it perfectly flat against the skin. I put Scotch brand magic tape over the rivet head to protect the skin. You can get this special removable tape at any Office Max. For the right wing I'm going to buy the official skin bucking bar from Cleveland Aircraft Tools.
|
 Riveted the skin to the main spar above the finished rib Riveted the skin to the main spar above the finished rib
I soon ran out of room to use the backriveting set on the skin to main spar rivets. I just switched places with my bucking buddy and used my mushroom head set on the front of the skin, while he bucked from behind.
|
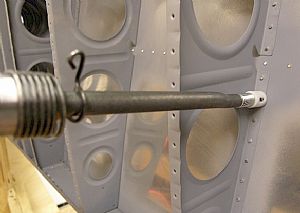
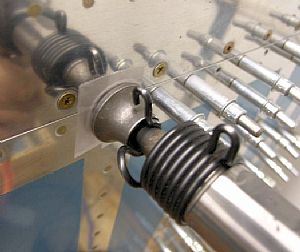
 Riveting the rear spar Riveting the rear spar
After riveting the skin to the main spar, I jumped down to the rear spar. What luck! My 4 inch no-hole yoke reaches these rivets perfectly. One less set of rivets to hit with the rivet gun! So my sequence here was to rivet one rib to the skin, then the main spar rivets above that rib and then rear spar rivets below that rib. I figure I have about 3-4 hours work left before finishing the skin.
|
Home Previous Entry Next Entry Back
|


