RV-9A: Right Wing Prep - 12/20/2006
Home Previous Entry Next Entry Back |
Share on:

|
|
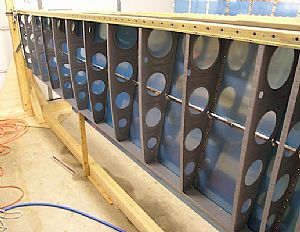
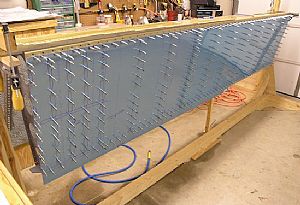 Finished final drilling the top skins Finished final drilling the top skins
First, I put in clecos in every other hole on both sheets and then drilled every un-clocoed hole, marking each drilled hole with a sharpie. Then I moved all the clecos over one hole and drilled the rest.
|
 Started work on the J Stringers Started work on the J Stringers
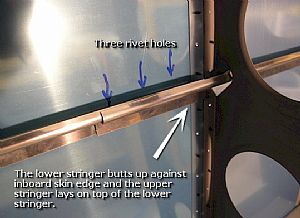
The J Stringers provide some horizontal support for the middle of the wing skins. I remembered working on these on the left wing. I thought it would easy since I�ve already done it. NOT! The instructions say to: "Slip the W-926B (J Stringer) into place so that it just butts up to the edge of the W-903 skin". This has to be a typo. The W-903 skin is the outboard skin, therefore the J Stringer lays on top of the W-903 skin and then actually butts up against the W-902 skin, where the skins over lap. So I cut the outboard J Stringer to the correct length and put it in place. Now comes the time for cutting the inboard J Stringer, which is shown on the left photo where the inboard J Stringer is overlapping the outboard J Stringer. The instructions don�t say how long to make the inboard stringer. It just says: "The two stringers overlap just outboard of the skin overlap." See the next entry.UPDATE 12/21/2006: OOPSIES... Turns out there is a measurement shown for the 2 J Stringers on Drawing 9. My good friend John from England emailed me about the measurements. Thanks John! BUT, if you cut the J Stringers as indicated, they contradict the rivet placement drawing, which shows 3 rivets past the skin overlap. These measurements only allow 2 rivets past the skin overlap.
|
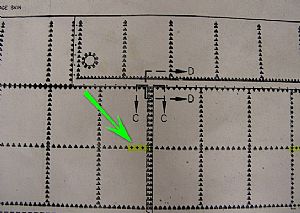 Ah-ha! The length of the inboard J Stringer is discovered! (or implied) Ah-ha! The length of the inboard J Stringer is discovered! (or implied)
I looked at Drawing 11 and looked at the size of the rivets that go into the J Stringer. I noticed that 3 of the rivets are longer than all the others, which indicates that the metal must be thicker here. So this tells me that the length of the inboard J Stringer must go 3 rivets past where the skins overlap, as shown by the previous picture.
|
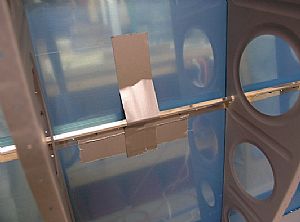 Time to drill the J Stringer(s) into place Time to drill the J Stringer(s) into place
I put duct tape over the bottom of the J stringer to hold it in position so the sharpie line I drew on the back of stringer would show through the pre-drilled holes in the skin. Then I put an additional hunk of tape over the top of the stringer to help hold it tightly to the skin. I did this between each rib.
|
 The J Stringers are done! The J Stringers are done!
Now for final drilling the bottom wing skins.
|
Home Previous Entry Next Entry Back
|


