RV-9A: Right Fuel Tank - 2/17/2007
Home Previous Entry Next Entry Back |
Share on:

|
|
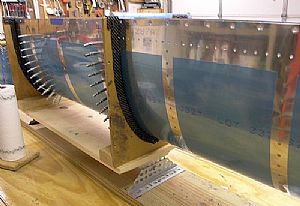 2 more ribs are in! 2 more ribs are in!
I slide the tank around left and right in the tilting tank jig to give me access to the rivets. The thing that slows me down on the tank is finding an hour and a half to devote my complete attention to this part of the process without interruption.
|
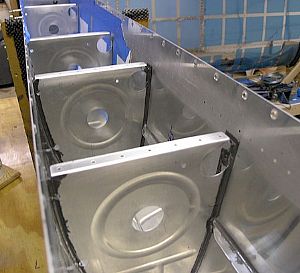 A shot of the ribs A shot of the ribs
The blue painters tape and typing paper combination really makes for a fast cleanup. I've started wearing 3 pair of rubber gloves on each hand for each rib session. I use the first layer of gloves for the riveting, then I peal that one off for proseal smearing session, then the last layer of gloves is for the tool cleanup. I actually came away from these 2 rib riveting sessions with hardly any proseal on my hands.
|
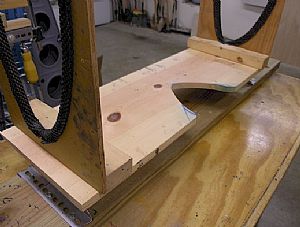 Had to modify the tilting tank jig Had to modify the tilting tank jig
In order to reach the rivet head on the top part of the tank skin with the rivet gun, I had to cut some of the 1x12 away. This cutout is for the center rib only. I was able to slide the tank left and right in the jig to get all of the other ribs riveted.
|
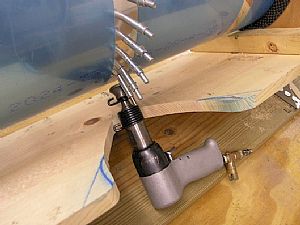 Yep, that'll work... Yep, that'll work...
I really wanted to keep this 1x12 attached to the end tank jigs to make sure that if one end of the tank accidentally get twisted or wrenched, it wouldn't break the seal on some of the ribs. The 1x12 insures that the end jigs stay parallel and level with each other.
|
Home Previous Entry Next Entry Back
|


