RV-9A: Ailerons - 5/7/2007
Home Previous Entry Next Entry Back |
Share on:

|
|
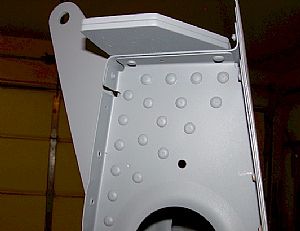 Started riveting on the flap brackets assemblies Started riveting on the flap brackets assemblies
The inboard bracket was pretty easy. I opted to use the old rivet gun and bucking bar combination. Unlike the other 2 flap brackets, these rivets were easy to get to. I riveted on the main W-925A bracket first, then the W-925B & C bracket attach angles.
|
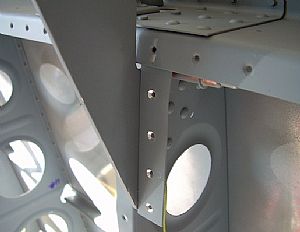
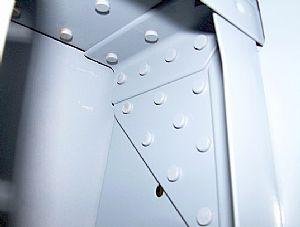 An inside shot of the inboard flap bracket assembly An inside shot of the inboard flap bracket assembly
I don't mind using the rivet gun and bucking bar combination when I can see both clearly as in this situation. Also, I cranked up the pressure on the rivet gun to 60 lbs on these rivets. It seemed to make things go a little faster, as well as a shorter amount of time spent holding the bucking bar in place, reducing the screw-up factor.
|
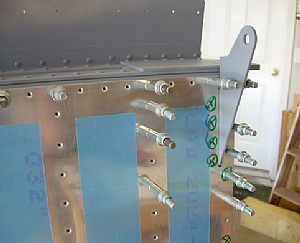
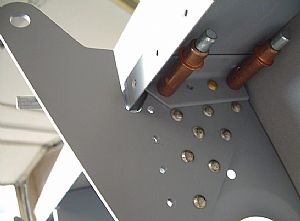 Now for the other flap brackets Now for the other flap brackets
I started out just like the inboard flap bracket and riveted the main bracket in, leaving the outer edge holes empty for the attach angles later. I put the W-925C in place an noticed right away that I wouldn�t be able to get to this rivet with the double offset rivet set that I already had. The 5 1/2 inch length of the set, combined with the length of the rivet gun would not fit between the ribs. So I ordered a single offset rivet set from Averys, which is only 1 1/2 inches long. Meanwhile I went ahead and riveted the top rivets from rear spar in and riveted on the W-925B longer angle bracket. I'll get these top 4 rivets in tomorrow when Averys does their usual "next-day" delivery. Love them Avery folks!
|
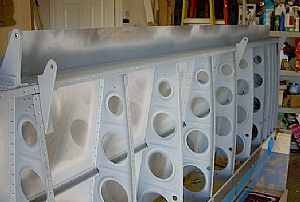 Thar' they be! Thar' they be!
Why stop now? I decided to go ahead and hang the bottom skins so I could final drill the W-925B flap attach angles using the bottom skins as a guide.
|
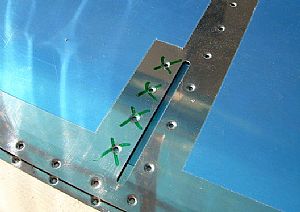
 Getting ready to final drill the W-925B attach angle holes Getting ready to final drill the W-925B attach angle holes
You can see my big green X's that I marked a long time to ago to prevent me from dimpling these holes in the skin. I used these holes as a guide to final drill the W-925B flap attach angle.
|
 Countersunk the rest of the W-925B rivet holes Countersunk the rest of the W-925B rivet holes
The toughest part about this angle piece is to remember to countersink the top hole that goes behind the rear spar flange, when first putting the whole assembly together. That hole was a little bit tricky to do.
|
 Dimpled the bottom skin holes for the angle brackets Dimpled the bottom skin holes for the angle brackets
Being the lazy person I am, I just opted to use the Avery pop-rivet dimplers for these dimples. I just had to SQUEEZE really hard for the inboard skin, since it is so much thicker than the outboard skin.
|
Home Previous Entry Next Entry Back
|


