RV-9A: Ailerons - 6/18/2007
Home Previous Entry Next Entry Back |
Share on:

|
|
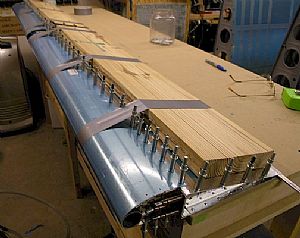 Started setup to final drill the trailing edges Started setup to final drill the trailing edges
I knew that I needed something heavy to hold the skins down. I had heard that other builders use lead shot in a bag, laid on top of a board to hold stuff down, but I didn't know where to get any and I didn't feel like going on a wild goose chase to look for some. So once again, I'm going to do this "Smitty" style. I went to Home Depot (my wife calls it Second Home Depot) and looked through a stack of 2x8's, looking for one that was straight and heavy. I finally found one that was cut from the center of a really old pine tree.
|
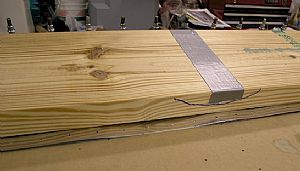
 Here's an end shot of the 2x8 after the cut Here's an end shot of the 2x8 after the cut
You can tell that this board came from a really old pine tree and not from a tree farm. Notice how close together the rings are. The closer the rings, the heavier the board. Notice also that the cut is close to the center of the tree. The combination of close rings and the center cut makes this board very heavy and straight. It's full of resin. Tree farm pines are grown as fast as possible for quick harvest and sale. Usually the pine board you get at any quickie lumber dealer is really light, like balsa wood. If you look at the end rings, you'll that they are very far apart. And if you get one of these light boards that is cut from the outside of the tree, it will turn into a ski when it sits in garage and has time to dry out. OK, my Dad was a master carpentar. Can you tell?
|
 Hmm... Hmm...
Nope, still ain't heavy enough. The skins are still buckling Captain!

|
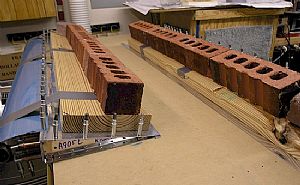 When in doubt, throw a brick at it When in doubt, throw a brick at it
I had some bricks left over from when my house was built, so I put a line of them on top of the board. Yep, that did it. Flat as a pancake.
|
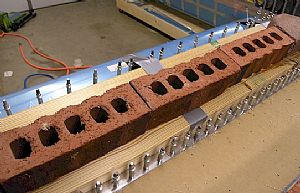 Final drilled the trailing edges Final drilled the trailing edges
I slide the aluminum wedge in from the ends of the skins and started drilling and clecoing right into the table top.
|
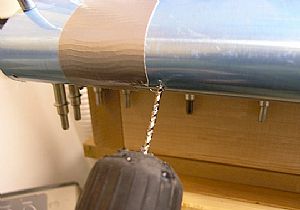 Final drilled the leading edge skin to the counterbalance pipe Final drilled the leading edge skin to the counterbalance pipe
The pipe behind the skin is stainless steel and really hard to drill into. Sooooo, I went back to Home Depot (again) and bought 3 really expensive 1/8" metal drill bits. I started off by using my spring loaded hole punch to establish the drill spot on the pipe. Then I put some Boelube on the bit and started drilling really slooooowww, stopping every once and a while to add more drill bit lubricant. There are 13 holes to drill in each aileron, so this really took a long time. It took all three drill bits to get these holes in. I should have gotten an additional bit. They are complete useless now. In the trash they go.
|
Home Previous Entry Next Entry Back
|


