RV-9A: Flap Motor & Landing Gear Mounts - 11/3/2009
Home Previous Entry Next Entry Back |
Share on:

|
|
 Time to work on the Electric Flap Actuator Time to work on the Electric Flap Actuator
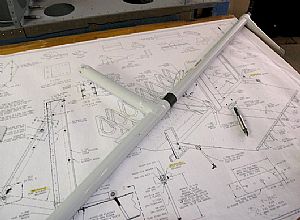
Here is the WD-613-EF flap actuator. I final drilled the holes in each clevis end to 1/4".
|
 Working on the F-680 block Working on the F-680 block
The F-680 block is made of really hard plastic and holds the flap actuator in place. For some reason this particular block was over 1/4" too wide. So I had to cut if off according to the measurement in the plans. After I drilled the bolt holes in it, I cut it in half so it can fit around the flap actuator pipe.
|
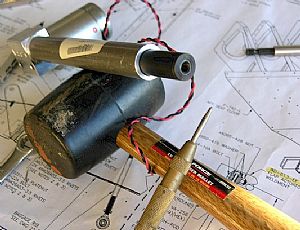 Drilling the safety wire hole into the ES-85615-157 flap motor shaft Drilling the safety wire hole into the ES-85615-157 flap motor shaft
I've never drilled a safety wire hole before, so this is a little spooky. I started off my establishing a starter hole using my spring loaded punch. Ignore the rubber hammer. I needed something to prop up the motor shaft to take this picture.
|
 Drilled the safety wire hole Drilled the safety wire hole
This is the "after" picture. To start the safetry wire hole, I drilled the hole partially straight up and down, perpendicular to the motor shaft. Then, after the hole was partly established, I turned the shaft to the proper angle so the drill bit would pop out the side of the motor shaft. It all worked pretty well. I used a 1/16" bit (the instructions didn't way what size to use).
|
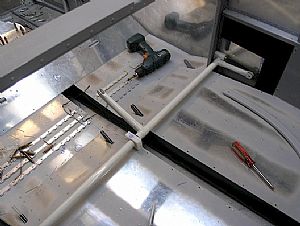 Trial fit of the flap actuator and blocks Trial fit of the flap actuator and blocks
Looks good! Tomorrow I tighten the blocks bolts on each end block and drill the center bolt holes into the floor rib.
Update: 12/9/2009.Well, I torqued the bolts on each end only to realize that the center bolts go into nutplates (not yet installed) after you drill the holes using the center block as a drill guide. The only way to install the nutplates in the center section is to remove the flap actuator. Then it was "back to the forums" to find out whether I could reinstall the nylock nuts again after they were already torqued once. Turns out you can reinstall previously torqued nylock nuts. See this thread on Van's Air Force, especially Mel Asberrys comment. He really knows his stuff. Here is his comment: "It is perfectly acceptable to reuse nylock nuts as long as you cannot install them by hand. The locking mechanism is secondary to the nut being torqued. If you want to use them once and throw them away, that's you choice, but it is certainly not necessary."
|
Home Previous Entry Next Entry Back
|


