RV-9A: Electrical - 9/14/2010
Home Previous Entry Next Entry Back |
Share on:

|
|
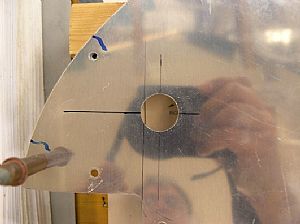
 Time to drill some holes in the panel! Time to drill some holes in the panel!
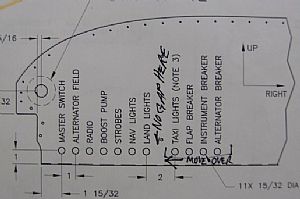
Spooky? Ya' dang right it is!! I'm really checking out this drawing to make sure I don't screw up. First things first. I have to drill the first 3/4" hole in the panel where the ignition switch goes. I also noticed that there is a gap in the drawing between some of the switches. There is a rib behind the panel there for RV-9As that have a tip up canopy. Mine is a slider type canopy, so I don't have rib at that location. So I will move all the switches together without a gap.
|
 Here's my first hole Here's my first hole
I drilled the ignition switch hole to 3/4 of an inch with my Unibit to get things started.
|
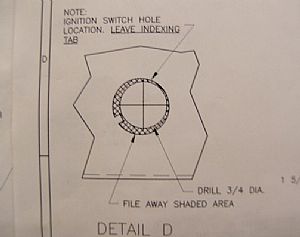 Step 2 - Make the hole bigger, but with a notch Step 2 - Make the hole bigger, but with a notch
This notch is called an indexing tab. I'm pretty sure it just keeps the switch from turning on you when you turn the key.
|
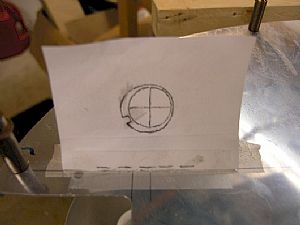 Made my own template Made my own template
My wife has a glass desk in her home office. I put a lamp under the desk so it would shine up through the glass, allowing me to trace the drawing onto a piece of typing paper. Then I positioned it over the 3/4" hole I made and scotch-taped it down on the bottom of the panel so I could hinge it up and down over the hole.
|
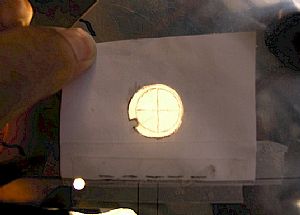 It's the moon! Nope, Jes' a piece of paper... It's the moon! Nope, Jes' a piece of paper...
This worked pretty good. I put a lamp under the panel to light things up. Then I used my round file and worked the edges out to match the paper pattern. But I didn't have any fine edge files to make the notch. So I went to Lowes Lumber and Aircraft Supply. Sure enough, they had just the thing I needed, a set of small files in a handy kit.
|
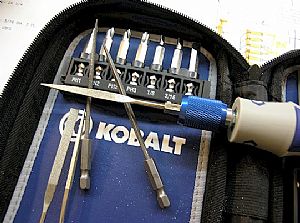 35 bucks? Ouch! 35 bucks? Ouch!
Yep, but I needed them. There is a set of rough files and a set of fine files for finishing.
|
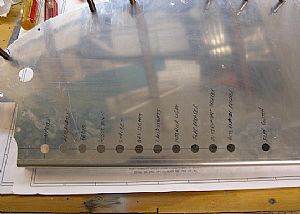 Time for the switch and breaker holes Time for the switch and breaker holes
I just love drawings that tell me what to do next. On my next airplane, I'll get fancier. But since I don't know Jack about electrical stuff, the wiring harness and switch kit are just fine with me. Here I've drilled all my switch aned breaker holes with my unibit in the drill press.
|
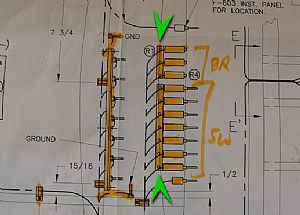 Here's a drawing of the switch/breaker placement Here's a drawing of the switch/breaker placement
There is a copper buss bar that provides power to the switches and the breakers. There is also another buss bar directly behind the switches are where all the radios, lights, etc are powered.
|
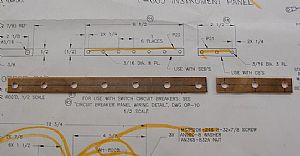 Drilled the holes in the copper buss bar Drilled the holes in the copper buss bar
This bar provides power to all the switches and breakers as shown in the drawing above.
Update 9/19/2010: Now that I have fitted the long copper bar on the switches, I have found that the short copper wouldn't work for the breakers that come in the Switch/Breaker Kit (ES WD-SW) from Van's. The holes that I drilled in the short copper bar are too large for the screws on 2 of the breakers. Also, the short copper had to be bent to custom fit the larger and longer 60 amp breaker for the alternator. Also, the Switch/Breaker kit only has on one 5 amp switch in it and you need two. The wiring plans show two 5 amp switches. Weird, huh?
|
 Why stop now? Why stop now?
I decided to put the ground cable and the positive cable into position around the battery.
|
Home Previous Entry Next Entry Back
|


