RV-9A: Electrical - 10/31/2010
Home Previous Entry Next Entry Back |
Share on:

|
|
 Hooked up the Master Switch wires Hooked up the Master Switch wires
The instructions say to do this last, but I wanted to test some of my wiring now. So I used my new #8 wire crimpers to attach the connector to the largest wire. It took both hands to make this crimp. The I crimped on the other two #18 wire connectors bolted everything down. The relays look like they're mounted crooked in the picture. It's just the camera or the camera man...
|
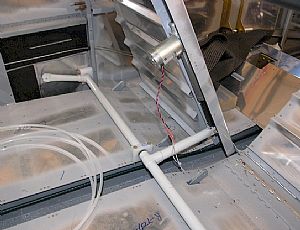 Here's are the flap motor connections Here's are the flap motor connections
Before I crimped these wires for good, I wanted to see which wire is which. Since both wires are positive, it doesn't matter which wire goes on the two wires coming from the flap switch in the panel, so I had a fifty-fifty chance of getting it right. Turns out I just happened to get the wires just right so I went ahead and crimped them together. Since this a "moving" experience, I decided to video it. Keep in mind my panel is following Van's Wiring Harness panel layout suggestions. I don't know anything about electronics, so I'm sticking to the plans (nuthin' fancy).
Battery Hookup Test from Smitty Smith on Vimeo.
|
Home Previous Entry Next Entry Back
|
SmittysRV.com is an Amazon Associate
|


