RV-9A: Wings Inventory & Setup - 2/21/2006
Home Previous Entry Next Entry Back |
Share on:

|
|
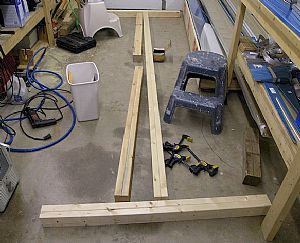 Started work on the wing jig Started work on the wing jig
I went down Lowes (aircraft supply) and bought two eight foot 2x4s, two ten foot 2x4s, two twelve foot 2x4s, some steel angles and some nuts and bolts. I plan to use the plywood that came with kit for reinforcement. I cut the eight foot 2x4s in half to make the foot supports on each end. Then I cut the ten foot 2x4s in half to make the vertical posts. Then I screwed the halfs and the two twelve foot 2x4s together.
|
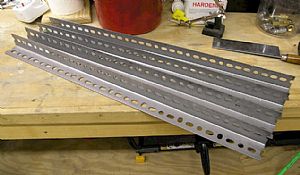 Here's a shot of the steel angles Here's a shot of the steel angles
They are 1 1/2" wide.
|
 Put the jig base together Put the jig base together
After cutting the 12 foot 2x4s to proper length for the jig, I used my pneumatic brad nail gun to put the base together. The center beam is "T" up with the two 4 foot end footings, dead center on each. I finished attaching the plywood up by putting in some 2 1/2" wood screws into the 2x4s.
|
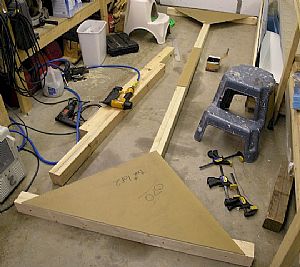
 Attached the vertical posts Attached the vertical posts
I flipped the base over and tacked the posts in place with my brad nailer. Then I nailed and screwed the plywood on to hold the vertical posts in position. You'll notice the odd shape of the plywood. I did that to provide more strength to the posts that support the wing directly over the center beam on wig jig base.
|
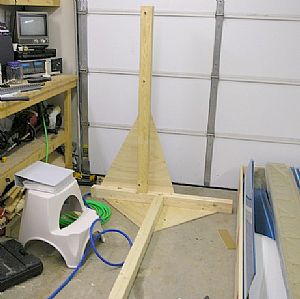
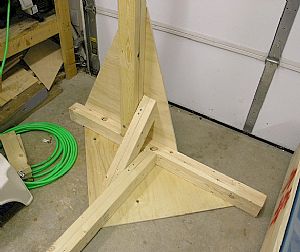 Cut the vertical post braces Cut the vertical post braces
I had some old 2x4s laying around and made these braces to hold the vertical posts stationary. Once again I used my brad nailer to position everything, checking the posts out with my level. Then I went back and put in 3 1/2" wood screws to hold everything permanently.
|
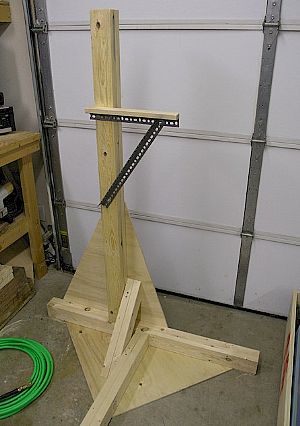 Attached the steel angles Attached the steel angles
At the advise of another builder, I put these steel angles at "armpit" height. I used 3 1/2" bolts to attach everything to the 2x4s. Leveling was quite a booger, since things tend to move while tightening the bolts.
|
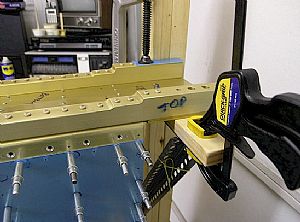
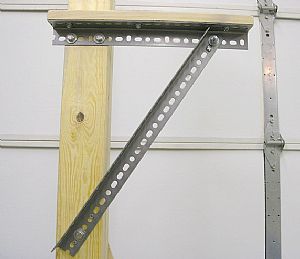 Added a wood block to the steel angle Added a wood block to the steel angle
This was some more advise from another builder. He told me that the steel angle scratches up the spar and a little wood block would protect it. You'll also notice that I put in extra wood screws in the steel angle, just prevent it from traveling.
|
 Just had to try it out Just had to try it out
Apparently I got calculations just right. I was worried about having enough or too much distance between the posts. Now I'm sure that other builders will start asking questions here. Like "why don't you build both wings at the same time?". Very simple, I aint' got no room to do both wings at the same time. Momma is very protective of "her side" of the garage. The other question is probably "why don't you have steel angles to attach the bottom spar?" I have heard that this new "pre-drilled" wing aligns itself quite well and the bottom spar can float freely and is forced to line up perfectly with the top spar. Time to get to work!
|
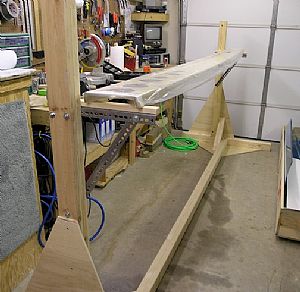
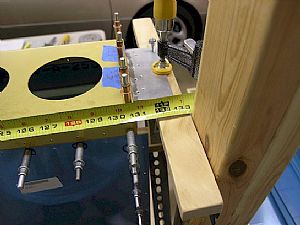 Now for a leap into the FUTURE! Now for a leap into the FUTURE!
UPDATE 4/19/2006 - Now that I am working with this jig, I've decided to post the dimensions that I lucked out with for the jig. This shot is of the back of the jig on the outboard left wing, showing the distance between the main posts. As you can see, it's right at 133", or more. You can also see that I had to push the aluminum angle attachment out a little away from the jig arm, because the wing skin sticks out past the rib.
|
 Another FUTURE shot Another FUTURE shot
This shot is on the front side of the outboard left wing. As you can see, the height of the top of the main spar is right at 50 inches. Or as described to me by another builder, "make it chest height".
|
 Yet another FUTURE shot Yet another FUTURE shot
This picture shows the inboard left wing main spar resting on the arm of the wing jig. As you can see, there is a lot of play room for the spar. Also I thought that I wouldn't have to clamp this main spar down, but when you start putting on the skins, the weight of the skins caused the spar to twist.
|
Home Previous Entry Next Entry Back
|


