RV-9A: Left Fuel Tank - 5/17/2006
Home Previous Entry Next Entry Back |
Share on:

|
|
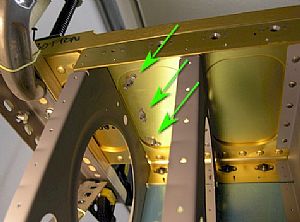 Installed fuel tank platenuts for inboard tank bracket Installed fuel tank platenuts for inboard tank bracket
I installed the three platenuts that the inboard fuel tank bracket screws into on the main spar. These were a little tough to "buck in the blind", but turned out nice.
|
 Time to remove the tank brackets from the baffle Time to remove the tank brackets from the baffle
Once again, thanks to the good info on Mike Schippers website, I was able to remove the temporary pop-rivets from the tank brackets. I used my spring-loaded punch to move the pop-rivet nail down into the pop-rivet hole.
|
 Drilled out the temporary pop-rivets Drilled out the temporary pop-rivets
With the pop-rivet nails out of the way, it was easy to drill out the temporary pop-rivets. I made sure not to go down into the hole all the way. All I had to do was drill away the top of the pop-rivet head and the rest of the pop-rivet fell through the baffle hole.
|
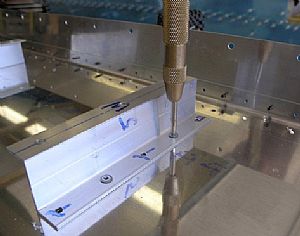
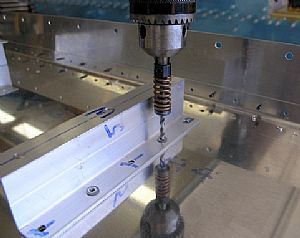
 Time for tank bracket platenuts Time for tank bracket platenuts
I used one of the tank attach bolts to hold the K1000-3 platenuts in place while drilling the holes for the flush rivets that hold the platenuts in place. I grabbed an old 2x4 to put the brackets on while drilling. After I got all of the #40 holes drilled, I countersunk them in each bracket, except for the innermost tank bracket, which doesn't get platenuts.
|
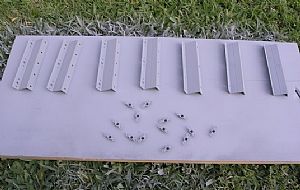 It's prime time! It's prime time!
After running the bracket edges over the Scotchbrite wheel, I cleaned everything up with some laquer thinner and a rag. I laid everything out, plus the platenuts on an old board and sprayed away. I think that the grass looks good in gray, don't you?
|
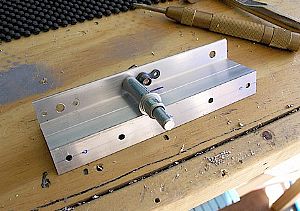
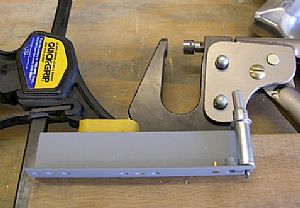 Riveted the platenuts to the tank brackets Riveted the platenuts to the tank brackets
I held the brackets down with a clamp on an old 4x4. The no-hole yoke was perfect for putting in these rivets. I am finding that I'm using that particular yoke a lot.
|
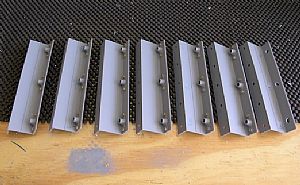 Thar' they is... Thar' they is...
This is where I begin to understand why builders wives (or husbands) don't understand why builders love to build airplanes. Each part that gets puts together gives the builder a great deal of satisfaction. "Look what I did!" It's very much the journey and not the destination.
|
 Time to cut out the T-905 tank attach angle Time to cut out the T-905 tank attach angle
I took my plans in the house and scotch-taped them to one of the windows. Then I laid some typing paper over the plans and made a template, using the outside light to see what I'm doing. I cut out the template and transferred the drawing to the hunk of aluminum angle that comes with kit. Then it was just a matter of cutting out the attach angle using the band saw. I layed the angle on an old 4x4 to steady it up while cutting. Here's the rough cut.
|
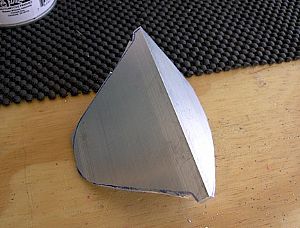
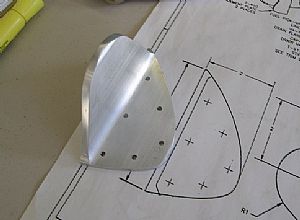 The finished product The finished product
I used my bench sander to finish off the attach angle, checking it against the drawing for accuracy. Then I hand sanded the edges and drilled the holes for the rivets that will attach it to the tank.
|
Home Previous Entry Next Entry Back
|


