RV-9A: Left Fuel Tank - 6/19/2006
Home Previous Entry Next Entry Back |
Share on:

|
|
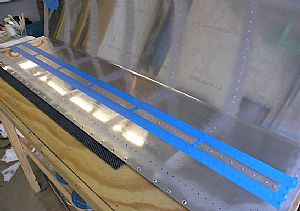 Getting ready to Proseal and rivet the left tank stiffeners Getting ready to Proseal and rivet the left tank stiffeners
I used lacquer thinner and paper towels to clean the tank skin and individual stiffeners. I was surprised at how much stuff came off during the cleaning. Then I put 3M painters tape around in between where the stiffeners will be attached to the skin. Then I gave it one more swipe with lacquer thinner to remove any oil that may have gotten on the tank from my skin.
|
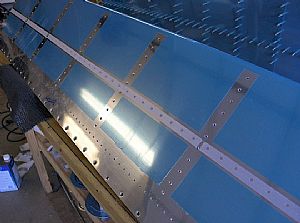 Taped in the rivets Taped in the rivets
I used 3M Removable Magic tape that I got from Averys to hold the rivets in place for the back-riveting session to come. I found out that I can also get this tape from CompUSA and Sams.
|
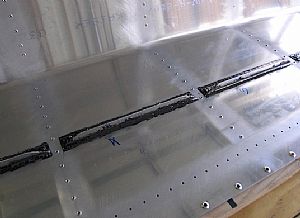 Started attaching the stiffeners Started attaching the stiffeners
I used my 2 syringes to suck up 20 cc�s of the proseal white goo and 2 cc�s of the black goo. I pushed everything out of the syringes onto a paper plate and mixed it all together with a popsicle stick. I decided not to put the mix into the third syringe for applying the proseal to the stiffener. Just too messy. Instead I used a popsicle stick to put a 1/16� layer of proseal on the back of the stiffener. Then I pressed the stiffeners onto the skin, allowing some of the goo to ooze out around the edge of the stiffener. I also decided to only do one stiffener at time. Then I back-riveted the stiffener in place. This pushed even more goo out around the edges. Then I used my popsicle stick at an angle to smooth out the edges around the stiffeners, making sure the proseal had a good seal all the way around the stiffener, kind of like caulking a new piece of glass into a window. Then I went back and put small glob of proseal on top of each rivet. I found that 22 cc�s of proseal will do 3 stiffeners. Having to make 2 batches for this session actually worked out better for me because I noticed that the proseal was starting to setup after the third stiffener. The temperature in the garage was in the 90�s, which, I sure, had something to do with the proseal setting up faster. After attaching all of the stiffeners, I removed the blue painters tape.
|
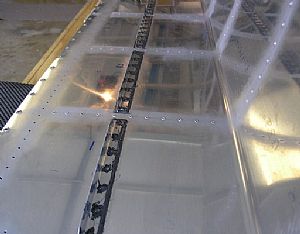 Here�s another shot Here�s another shot
The Orndorff video was a big help with this part. He spent a lot time explaining this application, but hardly mentioned the installation of the �inner� ribs, he only covered the outer ribs, which are riveted in with a hand squeezer. I really would have liked to see how the inner ribs were put in, using the rivet gun and a bucking bar. Also, just an update, I didn�t have to use the tongue depressers or the small paint brushes. Using the popsicle sticks to apply this stuff really worked well.
|
Home Previous Entry Next Entry Back
|


