RV-9A: Left Wing Skins - 9/18/2006
Home Previous Entry Next Entry Back |
Share on:

|
|
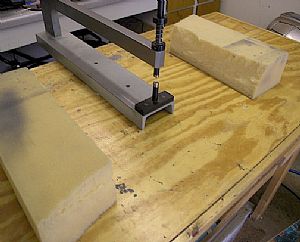 Getting ready to dimple W-902 (inboard top skin) Getting ready to dimple W-902 (inboard top skin)
Here�s my dimplin� table. It ain�t fancy, but it�ll work. The 2 chunks of four inch foam rubber just happen to be the same height as the top of the female dimple in the C Frame dimpler, which make the skin lay perfectly level on the bottom dimpler. I had a friend who made a fancy dimpling table where the C Frame dimpler went under the table top and the female dimpler popped up through a hole in the middle of the table. A very impressive and nicely built table, BUT, when he wacked the C Frame dimpler with his dead blow hammer, the skin when down into the table hole and made a nice round circular (large) indention around the dimple. His advice to me was, don�t do that.
|
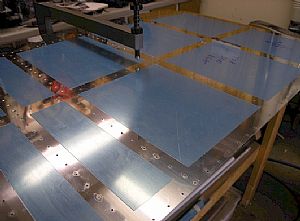 Time to start a� whackin�! Time to start a� whackin�!
The two chunks of foam rubber work perfectly. I even pulled out a third chunk of foam rubber to help support the skin when things got a little weird, dimpling wise that is. I gave each dimple one good "WHACK" with the dead blow hammer. As I mentioned in the previous page entry, whenever I hit the dimple more than once, it seemed to indent the skin around the dimple (at least that has been my experience). After finishing the dimpling with the C Frame dimpler, I went back over the dimples that didn�t look just right with my pop-rivet dimpler. This made the skin pass the fluorescent light test, with no visible dips in the skin around the dimples.
|
Home Previous Entry Next Entry Back
|
SmittysRV.com is an Amazon Associate
|


