RV-9A: Ailerons - 6/6/2007
Home Previous Entry Next Entry Back |
Share on:

|
|
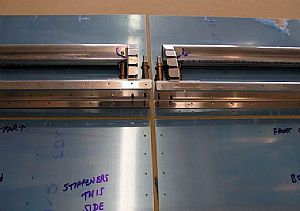
 Clecoed and drilled the A-908 reinforcing plates Clecoed and drilled the A-908 reinforcing plates
It's back to head scratching time. I had gotten used to the knowing what comes next while working on the right wing, having already done the left wing before. That's OK, it's good brain training.
|
 Clecoed and drilled A-904 ribs to the A-903 spar Clecoed and drilled A-904 ribs to the A-903 spar
I love typos. The instructions say to "drill and cleco the A-904 ribs to the A-903 spar". Shouldn't it be "cleco and drill"?
|
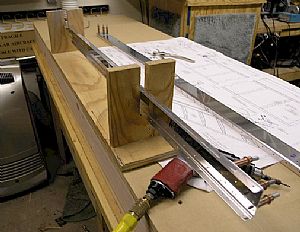
 Setup for drilling the A-909 counterbalance pipe Setup for drilling the A-909 counterbalance pipe
I'm not sure if I'm doing this correctly, but here goes.
I'm clecoed the A-901A nose skin to the A-904 nose ribs (not to the spar) with the skin on backwards. I don't understand what the instructions mean by putting the "skin on upside down". This should position the ribs correctly for marking the drill holes in the A-909 counterbalance pipe. I sacrificed a fine point sharpie by cutting it in half with my bandsaw. This allowed me to get to the bottom rib hole to mark the pipe. You'll notice that I have 2 clamps holding the spar flatly on the 2x8 particle board table top. This will insure that the holes marked on the pipe will be in the right position, making it perfectly aligned with the spar. A twist here would not be a good thing. I talked with other builders that told me they had to start over again on the ailerons because they didn't get the pipe perfectly aligned with the spar. After they put on the skins, the ailerons were twisted and even oil-canned on some. After I drilled the holes and put in the temporary rivets, I laid the assembly on the flat work bench to see if there was a twist in the spar because of the pipe not being drilled correctly. Luckily everything laid perfectly flat, no twist.
|
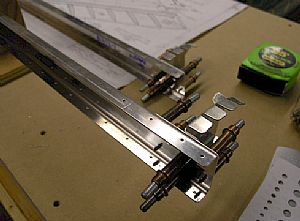
 Used the drill press to drill the pipe counterbalance holes Used the drill press to drill the pipe counterbalance holes
I used my spring loaded punch to establish the hole for the drilling. I made this wooden "V" block to prevent the pipe from turning on me while drilling. I put some boelube on the drill bit and drilled the holes "really slow". I noticed the 1/8" bit tended to bend and "wander" off the pre-punched mark when I put too much pressure on the drill press.
|
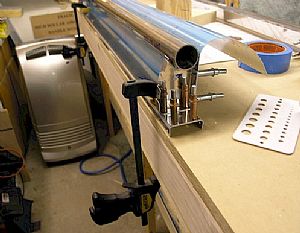
 Finito! Finito!
I put a cleco into the hole of the bottom rib into the pipe and then used a temporary AACQ pop-rivet on the outer hole to hold the pipe in place. Then I checked to see if the pipe had torqued the spar by standing the spar on it's back with he pipe above to make sure the spar laid flatly on the table.
|
 Cut out the stiffeners for the aileron skins Cut out the stiffeners for the aileron skins
This was pretty easy. These stiffeners are just like the elevator stiffeners. I did rough cuts with the bandsaw to cut them out. Now I will finish them off with the bench sander and the scotchbrite wheel.
|
 Lining stuff up Lining stuff up
This is somewhat of a brain teaser to decide which side the stiffeners go on. The deciding factor is the way the skins line up on the holes in the spar.
|
Home Previous Entry Next Entry Back
|


