RV-9A: Ailerons - 8/11/2007
Home Previous Entry Next Entry Back |
Share on:

|
|
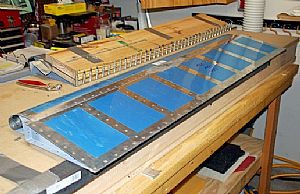
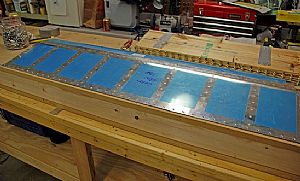 Ready to start riveting the trailing edges Ready to start riveting the trailing edges
It took quite a while to get the first aileron loose from the table where I clecoed it to the work top. Some of the proseal leaked out around the clecos under the aileron, apparently glueing the aileron to the table. After I pulled out all the clecos, I laid a putty knife flat on the table under the aileron edge and ran it down the table under the trailing edge to free up the aileron. I was thinking that there must be a butt-load of proseal under there. After removing the aileron from the table I saw only a few small spots around the clecos where the aileron was glued to the table top. That proseal stuff is really strong!
|
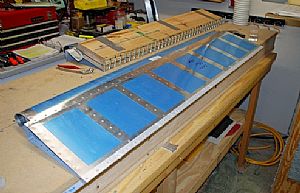 Getting ready to rivet Getting ready to rivet
Apparently my idea of prosealing the trailing edge together for couple of days payed off. The aileron laid flat on the table top without any twist at all. Also the trailing edge was perfectly straight. I was hoping that the riveting process wouldn't screw it up. Also I decided to use 3.5 rivets instead of size 3 because of the addition of the proseal inside the trailing edge. I loaded up the 3.5 rivets and tape them down using Scotch removable tape.
|
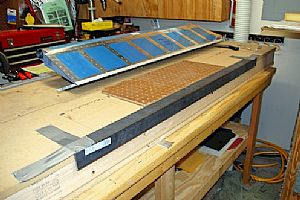 Got out my heavy steel angle Got out my heavy steel angle
I used this dude on the rudder and it turned out perfect. I got it from either Home Depot and Lowes (I can't remember). I taped it to the work bench to it wouldn't move. I also found a scap piece pegboard to help hold the aileron up even with the steel angle.
|
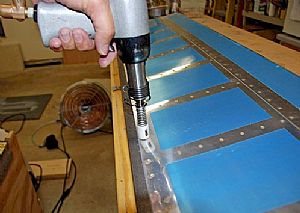 Started off backriveting the bottom side Started off backriveting the bottom side
I flipped the aileron over and started backriveting, holding the backrivet tool at an angle that was perpendicular to the rivet. I only gave each rivet a quick "blurb" with the rivet gun, just enough to flatten the end just a little, not all the way down. I did every 5th rivet first and then jumped around and did all the others.
|
 Finished riveting on the top side Finished riveting on the top side
I flipped the aileron over again and finished off the rivets on the top using a mushroom head. Again, I only used short bursts, just enough to flatten the shop head on the other side of the aileron.
|
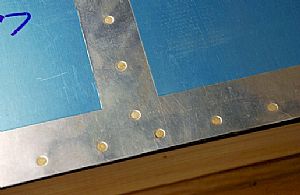 Success! Success!
It really turned out nice. A nice staight edge and good looking manufactured heads on top.
|
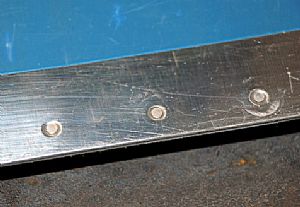 On the flip side On the flip side
The 3.5 rivets were just the right size for the shop head on the bottom of the aileron. You'll also notice a little "smilie" on the right most rivet. Apparently I went a little bit overboard with the backrivet tool. Filler please!!!
|
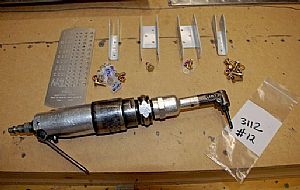 Time to attach the hinge brackets Time to attach the hinge brackets
I layed everything I needed to install the hinge brackets. I noticed that there are 2 really thin washers with the fat ones. These washers will go on the bolts that screw in to the nutplates already riveted on the aileron spars. You'll also notice that I have loaded a #12 drill bit to my old pneumatic angle drill. When I got this drill I called Averys and asked them to advise me as to what drill bits to order. There said "no problem" and gave the exact drill bits I would need to finish my RV. I like it when I don't have to think. They also sent me this handy dandy aviation drill bit size checker. This thing has really comes in handy.
|
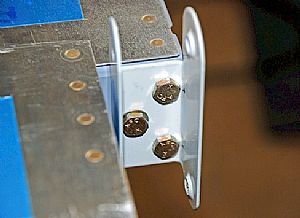 Here's the large hinge bracket in place Here's the large hinge bracket in place
It's kinda' tough get to a torque wrench in here since bolts are so close the sides of the brackets. I had to modify my tools a bit to get in there. I am amazed at how times I've used my bench grinder to create new specialty tools.
|
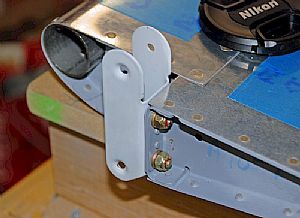 Done! Done!
I'm amazed at how many of these plastic centered nuts are used on the bolts on this aircraft. They are self locking and supposedly do not come off.
|
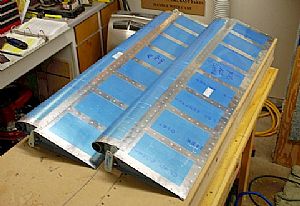 Here they are!! Here they are!!
I am really pleased with how these ailerons turned out. These dudes were pretty tough and labor intensive, right up there with those cottin' pickin' fuel tanks (in my opinion). Now, time to move on to the flaps!
|
Home Previous Entry Next Entry Back
|


