RV-9A: Flaps - 11/17/2007
Home Previous Entry Next Entry Back |
Share on:

|
|
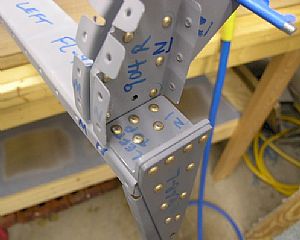 Finishing up rivet the ribs and spar together Finishing up rivet the ribs and spar together
That's a lot of rivets! After some head scratching, I decided to rivet on the FL-906C spacer and the "L" shaped FL-906A angle piece first, leaving the end holes in the spar open for attaching the rib later. Then I riveted the end rib/FL-906B to the FL-906A angle and spar.
|
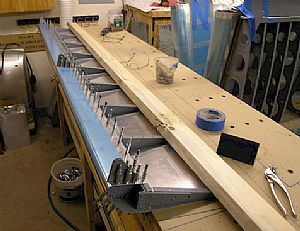
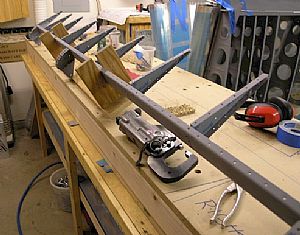 Riveted on the rest of the ribs Riveted on the rest of the ribs
This was easy, compared the end ribs. I used my pneumatic squeezer with the longeron yoke. The spar holder jig shown is this picture is probably my most used jig. It really frees up your hands.
|
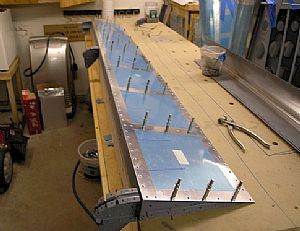 Clecoed on the top skin Clecoed on the top skin
|
 Clecoed on the front skins Clecoed on the front skins
|
 Clecoed down the front skins on the other side Clecoed down the front skins on the other side
I used the previously drilled holes in the work bench to allow the top skin to lay flat on the table top. I placed the clecos in the original position they were when the work table holes were first drilled. I clecoed the front skin to the spar knowing that these clecos will come out later to put the bottom skin on. This will make it easier to put the pop-rivets in, in the next step.
|
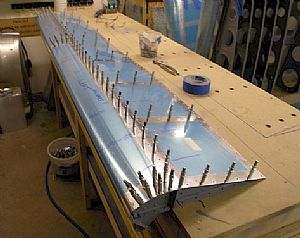
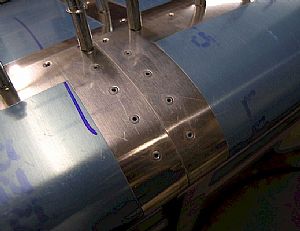 Started putting in the pop-rivets into the leading edge skin Started putting in the pop-rivets into the leading edge skin
The instructions say that these holes need to drilled out using a 7/64" bit to allow the installing of the flush fitting MK-319-BS pop-rivets. All of the holes on the leading edge skin are pop-riveted except for the holes in the ends of the flap, which will get regular rivets. According to at least one DAR I know, MK-319-BS are considered to have the same strength as any AN3 rivet.
|
Home Previous Entry Next Entry Back
|


