RV-9A: Other Bulkheads & Longerons - 7/10/2008
Home Previous Entry Next Entry Back |
Share on:

|
|
 Started working on the Longerons Started working on the Longerons
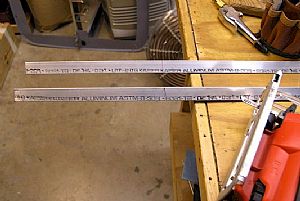
I think I've procrastinated enough now, so now I'm going to tackle these dudes. First item on the menu is to cut the longerons to length. I measured 173 7/16 inches for the cuts. I remeasured again and again to make sure I had it right. I bought a metal cutting blade for my jigsaw and cut the longerons. I put some oil on the blade to make the cut a little easier.
|
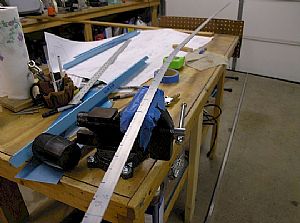
 Made the cuts in the aft end of the longerons Made the cuts in the aft end of the longerons
To make this a little easier, I taped both longerons to a piece of 3/5 inch plywood so they would sit flat for these cuts. After making the marks for the aft most cuts, I laid the F-714 aft deck on the longerons to mark the inmost cut. Then I used my jigsaw with some oil to make the cuts. I stopped just shy of the most inward cuts, then made several cuts through the middle of the piece to be cut out to free up that piece. then I finished off the cuts with a round file to get that nice rounded look.
|
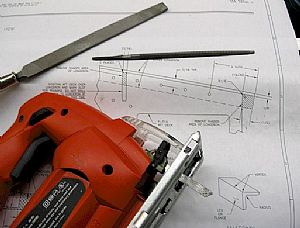 Here are my tools Here are my tools
After making the initial cuts, I finished everything off with a regular flat file and a round file.
|
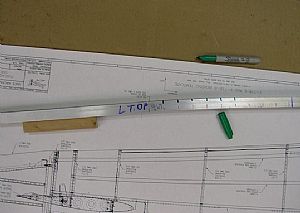
 Taped drawing 18 to a piece of cardboard Taped drawing 18 to a piece of cardboard
This drawing has a template to help make the bend in the longerons.
|
 Padded the vise Padded the vise
I got some of that rubbery stuff that goes under your living room throw rug and rolled them up and taped them to the jaws of my vise. This allowed me to put the longerons in the vise without messing up the bends I've already made.
|
 Started make the bends Started make the bends
I made all the marks called for on the longeron. Then I made additional marks every inch down the line to help me move the longeron one inch at a time for the bends. I pulled on the longeron in the direction I wanted it to go and then started whacking it with a rubber hammer. Then started the back and forth bend checking with the drawing on the cardboard. Then the instructions said to start using the F-721B aft canopy deck as a go-bye for the rest of the bend. I noticed immediately that no matter what I did, this longeron started bowing along the line. After I finished with the whackin' and checkin', I turned the longeron 90� and clamped it in the vise and bent it back straight with just my hands. When I got the bow out, I noticed that the original bends that I put in with the hammer were now off from the chart. So I went through the whole process again, eventually getting the longeron just right.Here an article from Van's about using the F-721 as a "go-by":
UPDATE FROM THE RVATOR ABOUT BENDING LONGERONS.
When bending the longerons for the side by side two seat airplanes, there are two possible templates. One is printed full size on the drawings The other is the F-721 aluminum canopy deck, which is prepunched to the correct curve. Before pre-punching, the canopy deck and the longeron were both shaped to fit the paper pattern. But we have found that the paper printing process can vary dimensionally, so it isn�t unheard of for the paper template and the pre-punched aluminum part to mis-match. Now, the aluminum canopy deck is going to rivet onto the longeron � the paper pattern is not. So it seems logical to bend the longeron to match the canopy deck. Looking ahead, you can see that differing curves on the longerons will affect the curves necessary in the canopy frame � and is one reason we tell builders that the plans dimensions on canopy drawings are a place to start, not an absolute. These are. after all, handbuilt airplanes so some variation and adaptation is inevitable.
|
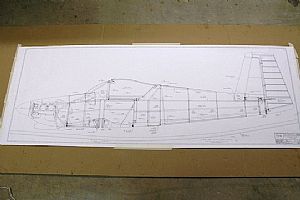
 Checking the bends Checking the bends
I have discovered new muscles in my back and legs. OUCH! I lost count of how many times I went to this chart to check my bends. There were a whole lot of "Damns" and "Craps" going on.
|
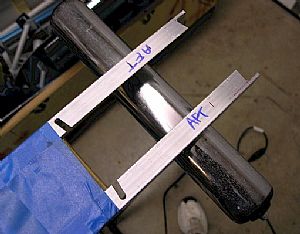
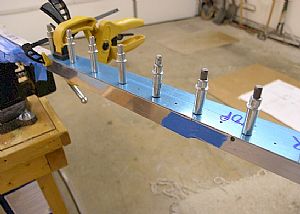 Time to drill the F-721B's in place Time to drill the F-721B's in place
This was easy compared to the rest of the job. I taped a piece of 0.032� aluminum to the outboard surface of the longeron and fit the F-721 B aft deck to the top of the longeron. I drilled and clecoed every other one and then went back and drilled the rest of the holes. The scrap piece of the aluminum is to mimic the fuselage skin that will go up under the F-721 B aft decks.
|
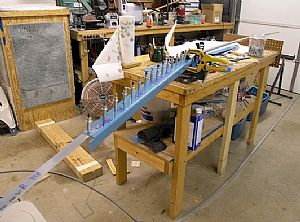 Done! Done!
Tomorrow I will make the last bend needed to the forward ends of each longeron.
|
Home Previous Entry Next Entry Back
|


