RV-9A: Center Section - 1/19/2009
Home Previous Entry Next Entry Back |
Share on:

|
|
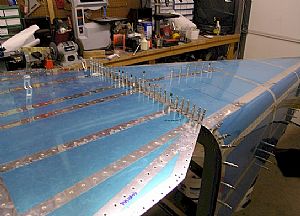
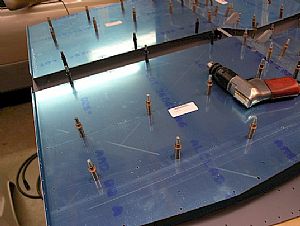 Final drilled the center section floor skins Final drilled the center section floor skins
This is really starting to look cool. My kiddo was asking all sorts of questions about where he's going to sit. I told him, "Your rear goes here, and your legs go here, and these things hold the seat belts." Then he said "Coooool".
|
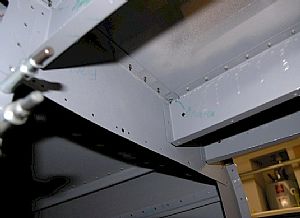
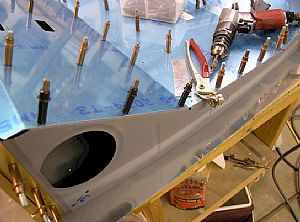 Drillled the outer seat rib Drillled the outer seat rib
I used a scrap piece of aluminum sheeting as a go-by to make sure that the rib stuck out far enough past the seat skin being drilling. I'm assuming that the reason for this is to keep the floor skin from rubbing a hole into the side skin of the fuselage.
|
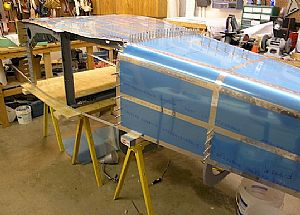
 Time to put the tail and center section together Time to put the tail and center section together
I went down to Lowes Aircraft and Lumber Supply and bought another of these really strong steel sawhorses. I also bought 2 2x4 pre-cut studs to mount on top of the them, since the center section is wider than my sawhorses are long. I cut both of them at a 54 inch mark. The 54 inch pieces will go on the sawhorses that will support the center section. The shorter pieces will go on the tail section sawhorses. These sawhorses come with a convenient pre-drilled hole to allow you to attach boards.
|
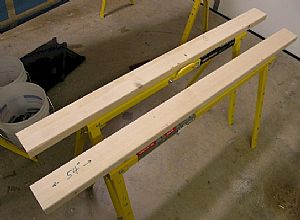 Here they be... Here they be...
Ready for duty!
|
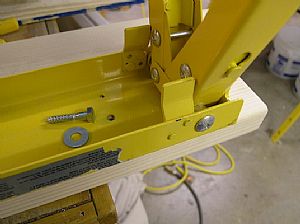
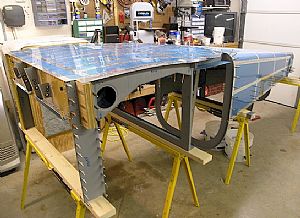 Positioned the center and tail sections on the sawhorses Positioned the center and tail sections on the sawhorses
These sections don't get clecoed together yet. The longerons have to get put in first. You'll notice that I added a strip of 3/8" plywood to the top ofthe tail section sawhorses. That's because I'm going to put a small sheet of plywood on top of the center section sawhorses later. There's something about the section barely sitting on two sawhorses that scares the hell out of me.
Update - 1/27/2009: Turns out the plywood was not a good idea after all. It was obvious to me that putting the plywood under the center section for stability was going to prevent me from getting to the interior from "down under". So I removed the plywood and the spacers from the tops of the rear sawhorses so everything would sit level.
|
 Placed the longerons under the side skin Placed the longerons under the side skin
This is really a two man job, so it was little tough to get these skins in by myself. I finally got this longeron where it needed to go and then found that the pre-cut slots in the bulkheads where not wide enough to allow the longerson to slide in. Dammit! I thought that that was a little weird.
|
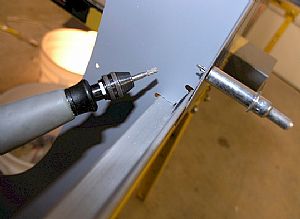 Time to improvise Time to improvise
I read on a couple of other builders websites that they ran into this predicament also. So I got out my Dremel tool and shaved off a little of the slot on the bottom side and the longeron slid right in.
|
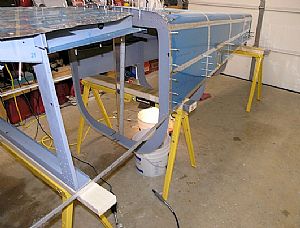
 Time to put things together Time to put things together
I had to shim up the center section a little on the sawhorses to allow the sections to meet up OK. Right away I noticed that I was going to have to take the baggage compartment skins off so I could see what I was doing to make these guys match up.
|
 Done! Done!
I crawled under the fuselage and line up everything as good as I could, making the tabs go on top of the bulkhead. Then my son and I got on each end of the fuselage and pushed the whole thing together. Then it was just a matter of clecoing the sections together. YEEE HAAW!
|
 Thar tis! Thar tis!
Looking good!
|
Home Previous Entry Next Entry Back
|


