RV-9A: Forward Section - 2/20/2009
Home Previous Entry Next Entry Back |
Share on:

|
|
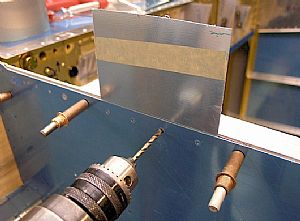
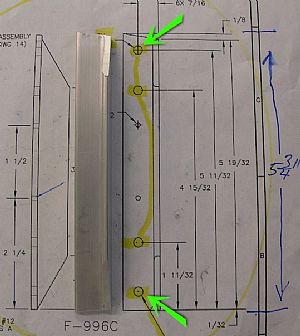 Here's the scoop on the F-996C Reinforcement Angle Here's the scoop on the F-996C Reinforcement Angle
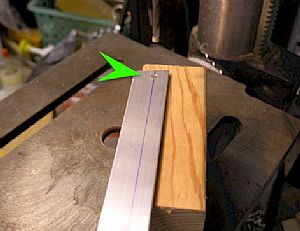
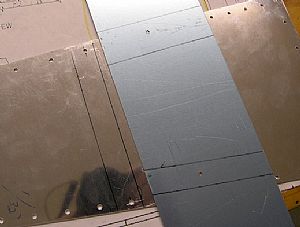
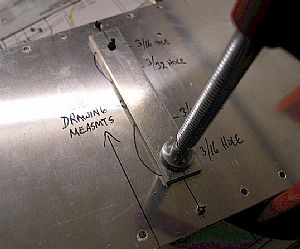
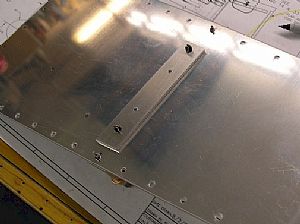
Yesterday I created the right F-996C Reinforcement Angle, the F-996B Spacer and drilled everything to the F-9101 web and the side fuselage skin. So today I'm taking pictures of the whole process for the left side in case someone else hits this road block in construction and needs help. In summary, the whole issue with this part of the construction is that the measurements on the drawing depicting the end holes in the F-996C Reinforcement Angle are incorrect. The end holes depicted in the pictorial on the drawing are incorrect as well. However, it appears that measurements for the overall length of the angle are correct. All the hole measurements between the end holes seem to be correct as well. Here, I have created (another) F-996C reinforcement angle without any holes in it.
|
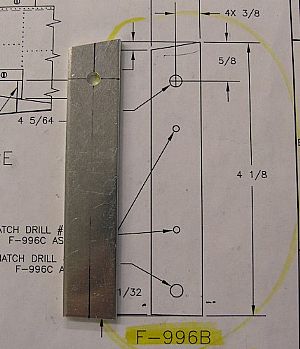 Made the F-996B Spacer Made the F-996B Spacer
No problem with this dude. I went ahead and drilled one hole as instructed. However this spacer will need some trimming on both ends when it is fitted to the fuselage.
|
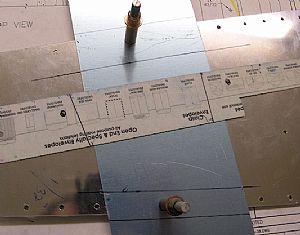
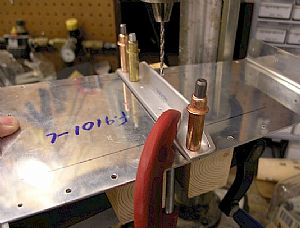
 Time to drill the correct holes in each end Time to drill the correct holes in each end
I drew a line on the back of the F-996C as instructed and lined up the line with the holes in the fuselage skin, longerons and the F-9101 web and clamped down one end.
|
 Marked the hole on the opposite end Marked the hole on the opposite end
I sharpened a pencil and poked it in the hole to make a mark on the F-996C where the first hole needs to go.
|
 Drilled the marked hole on the drill press with a #30 drill bit Drilled the marked hole on the drill press with a #30 drill bit
Now back to the fuselage for the other hole.
|
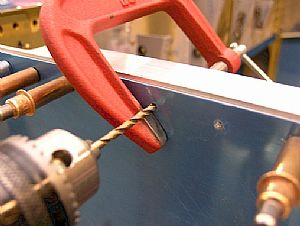 Drilled the hole on the other end of the F-996C Drilled the hole on the other end of the F-996C
I bought a couple of these C-clamps from Lowes and ground off one end for tight spots just like this one. After lining the skin hole with the line on the back of the F-996C angle I drilled the other hole with a #30 bit using the fuselage rivet hole as a guide.
|
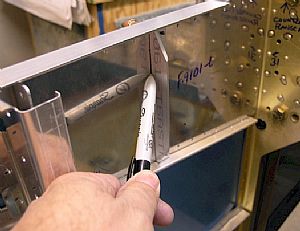 Time to make cheater marks Time to make cheater marks
I got out my fine print sharpied and outlined the F-996C angle on to the 9101 web. This will come in handy later.
|
 Wait! I ain't through yet! Wait! I ain't through yet!
After removing the F-996C angle, I grabbed a really thin sheet of aluminum from the old tailkit sheet bundle and shoved it between the outside skin and the longerons. Then I outlined the tops and bottoms of each longeron into on to the thin sheet metal with my sharpie. This will be my template to tell me how much to cut off the ends of the F-996B spacer.
|
 It just ain't no good without a marker! It just ain't no good without a marker!
Before removing my homemade template, I drilled 2 holes (top and bottom) into the template using the holes where the F-996C angle was clecoed on.
|
 Here are my templates Here are my templates
Know I where everything WAS.
|
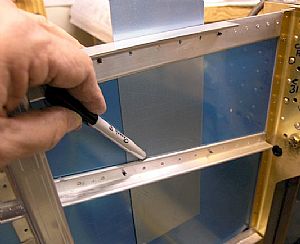
 Transferred the template lines to the F-9101 web Transferred the template lines to the F-9101 web
I clecoed the template onto the web and transferred the position of the longeron with my sharpie and a ruler.
e
|
 Here's my template for trimming the F-996B spacer! Here's my template for trimming the F-996B spacer!
|
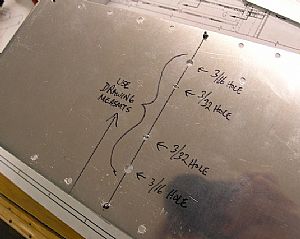
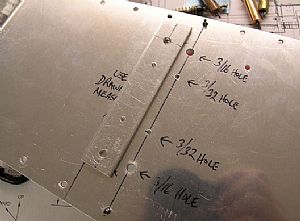
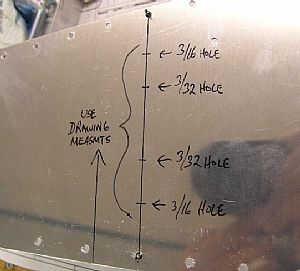 Time to drill the rest of the holes Time to drill the rest of the holes
I clecoed the F-996C reinforcement angle back on to the F-9101 web, then flipped the web over and drew a line between the holes where the angle was clecoed on. Then, using the dimensions on the drawing, I marked the spots for the holes in the reinforcement angle on the back of the F-9101 web. Note here: I measured from the bottom of the F-996C reinforcement angle for these drill spots, not the edge of the F-9101 web. This was pretty easy, considering that the F-996C reinforcement angle sticks out a little, past the edge of the F-9101 web.
|
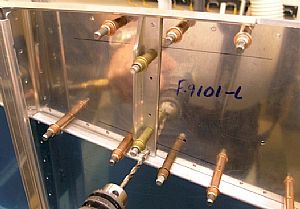
 Tada! Ain't that purdy? Tada! Ain't that purdy?
I use my drill-press to drill these 3/32" and 3/16" holes into the F-9101 web and into the F-996C reinforcement angle which was clecoed on the back of the web.
|
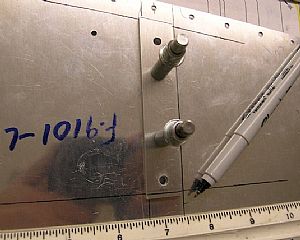
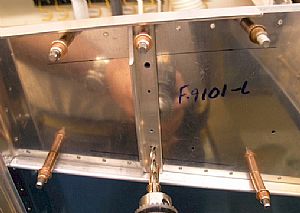
 Here's the flip side Here's the flip side
All the holes look perfectly lined up.
|
 Now for that pesky F-996B Spacer Now for that pesky F-996B Spacer
Using the pre-drilled 3/16" hole in the spacer and the new holes I had just drilled in the web and the angle, I clecoed the spacer in place and put a clamp on the other end. I also lined up everything on the clamp end with a line that I drew on the back spacer according to the plans.
|
 Drilled the 3/32 holes first Drilled the 3/32 holes first
Here, I drilled through the pre-drilled holes of the angle, the web and finally into the F-996B spacer, which was clamped and clecoed on the back of the web.
|
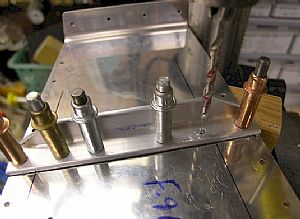 Now for the 3/16 holes Now for the 3/16 holes
I put 3/32 clecos in the holes drilled in the previous step, which held the F-966B spacer in place behind the web so I could drill this 3/16 hole into it, using the pre-drilled hole in the angle and web.
|
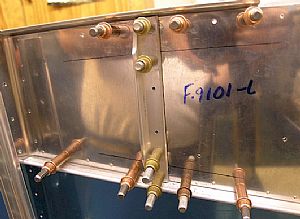
 Turned out pretty good Turned out pretty good
Here's the F-996B spacer with all the holes in it.
|
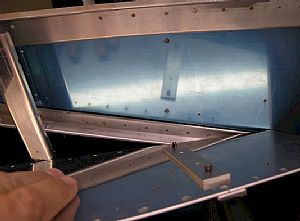
 Remember the thin aluminum sheet template? Remember the thin aluminum sheet template?
Here's where it comes in handy. I clecoed the F-996B spacer onto the F-9101 web and marked the ends that needed to be trimmed so the spacer will fit between the longerson just right.
|
 Trimmed and ready to go! Trimmed and ready to go!
Now, on to drilling the holes into the fuselage skin.
|
 Removed the F-966B spacer before putting the web back Removed the F-966B spacer before putting the web back
Since the clecos holding the spacer to the web will get in the way, I removed the spacer temporary from the web and reinforcement angle, which is clecoed to the back of this web.
|
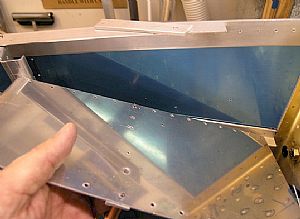
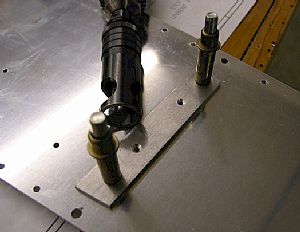
 Drilled the 3/16 holes into the outer skin Drilled the 3/16 holes into the outer skin
BUT NOT the 3/32 holes. Live them dudes alone!
|
 Time to put the F-996B spacer back in Time to put the F-996B spacer back in
Now it's time to put the whole kit and kabootle back together to do some final drilling into the longerons.
|
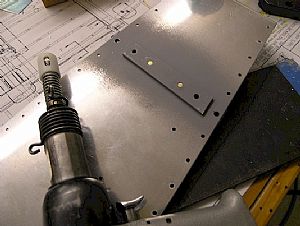
 Time to drill the end 1/8 holes to 3/16 Time to drill the end 1/8 holes to 3/16
I drilled these holes all the way through. These holes will have screws later on, and the skin will need to be dimpled, but that's much later.
|
 Thar' tis! Almost finished! Thar' tis! Almost finished!
|
 Time for some countersinking Time for some countersinking
In order for the F-996B spacer to lay flat against the inside of the outer skin, the rivets need to flush with the surface of the F-996B spacer. So here, I countersunk the spacer.
|
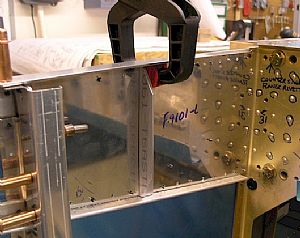
 Time to rivet it all together Time to rivet it all together
I put the F-996C angle on the back of the F-9101 web and the F-996B spacer of the front of the web and back-riveted it all together using my backplate. The rivets are size 8. The longest damn rivets I've seen yet, especially for 3/32" rivets. Oh, by the way, don't even think about using a hand squeezer on these puppies. Stove pipe city! Don't ask me how I know....
|
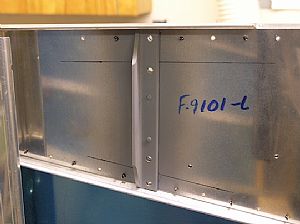 Finito! Finito!
|
Home Previous Entry Next Entry Back
|


