RV-9A: Fuselage Plumbing - 1/25/2010
Home Previous Entry Next Entry Back |
Share on:

|
|
 Time to start the Fuselage Plumbing! Time to start the Fuselage Plumbing!
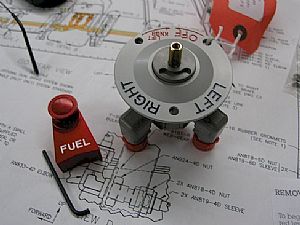
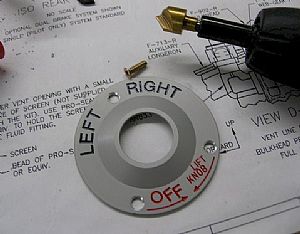
I haven't been looking forward to this part. Mainly because the only experience I've had with any type of metal tubing was running copper water lines in the houses that my Father and I have built over the years. I'm curious at how one navigates the various metal tubing lines through the holes and sharp turns in the fuselage. I guess it's like a kid learning to swim, just jump in and start flappin'. Here's the Andair Fuel Switch. Very cool looking switch. First thing to do is remove the nob. No biggie, just lift up the round nob and loosen the screw with a special allen wrench (and loosen, and loosen, and loosen...).
|
 Nutplates and the fuel switch Nutplates and the fuel switch
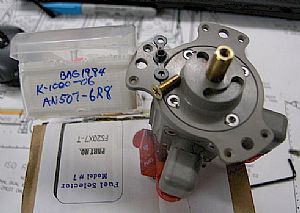
Apparently there are a number of ways to install the fuel switch. I decided to take advantage of the nutplate flanges on the switch. The nutplate holes are already countersink. So I "borrowed" some nutplates (K-1000-06) and screws (AN507-6R8) from the finish kit, which will probably bite me on the butt later on.
|
 Nutplates are on! Nutplates are on!
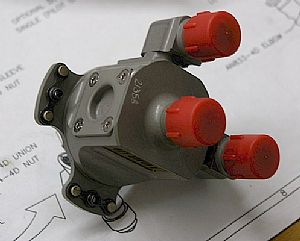
There where also a bunch of screws that were in a ziplock bag along with a matching allen wrench. The instructions didn't say what to do with these screws. I noticed that the two outside connections had screw holes without any screws in them. So I assumed that this was done so you could remove the outside connections and turn them in another direction. So I just installed the screws in these holes. After a few screw turns, the allen wrench that came with the kit stripped and I had get one of my "good" wrenchs to finish up.
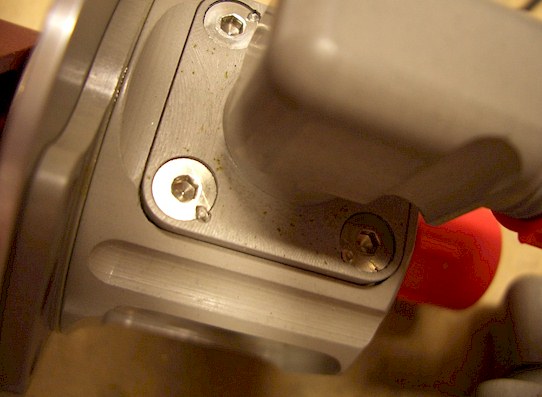
UPDATE: 6/9/2010 Hold the Phone! I just found out that the screws that hold the two side pieces on have to be staked. Someone on Van's Air Force Forum found that these screws had come loose and starting leaking fuel. There is a small (really small) notch in the metal around the edge of the screw on the switch itself and you have to "stake" the edge of the screw into this notch to make sure that these screws never work their way out. I had disconnect everything pull the switch off to stake these damn screws. The instructions didn't say crap about any of this. They provide the notches in the switch around the screws but don't tell you what they are for. Here's a picture I "borrowed" to show what this whole thing is supposed to look like. I payed a lot of money for this switch. I should have stuck with Van's switch.
|
 Now for the faceplate Now for the faceplate
The flaceplate is fairly thick. So I decided to countersink the holes a little bit to better fit the screws from the finish kit.
|
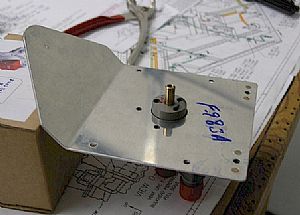 Opened up the hole in the fuel switch plate Opened up the hole in the fuel switch plate
I used my unibit to open a 1 inch hole in the switch plate. Yea, I know, the fuel switch is backwards. I'm just checking the fit of the fuel switch in the hole.
|
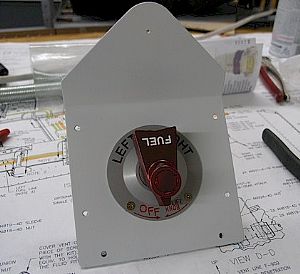 Installed the Fuel Switch Installed the Fuel Switch
I went ahead and painted the fuel switch plate, just to get a clean line around the fuel switch. The screws fit nicely in the cover plate.
|
 Head scratchin' time... Head scratchin' time...
How in the hell do you determine the length of the pipe? Hmmm.... I decided to grab some Romex (electrical wiring used in home construction) and make a length pattern. I ran the Romex through the holes for the first fuel line run.
|
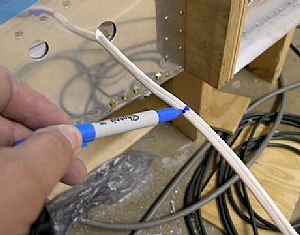 Making the mark Making the mark
The Romex is a perfect tool for determing the length of the fuel lines. It's very flexible and holds the form that you put it in. Here, I'm marking the cutoff point for the fuel line.
|
 Transferred the mark to the fuel line Transferred the mark to the fuel line
I also added a couple of inches just for paranoia's sake.
|
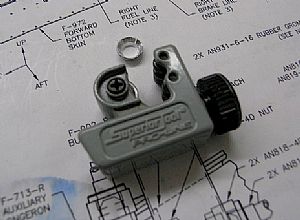
 Made the cut Made the cut
I love this little pipe cutter. It's really easy to get into tight places. It also has a "save your butt" feature that I talk about at the bottom of this page.
|
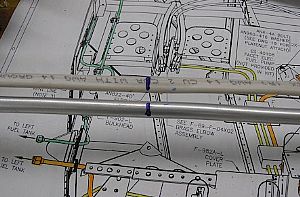
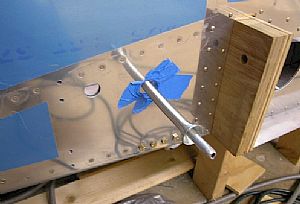
 The first Fit The first Fit
"Fit" could defined here as "jumping up and down cursing like a sailor", which is what I did trying to get this damn tube in without putting a kink in it. I tried going in from the outside and decided that that was not the way to go. I also noticed the outside hole in the skin was scratching the tube, so I put painters tape around the inside of the hole. Then I tried going in from the inside to the outside and things started to work. I molded the line a little at a time, as I navigated through the holes.
|
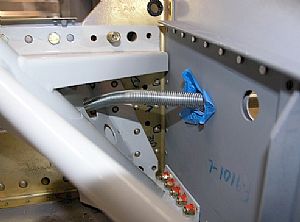
 Finally! Finally!
Now it's time to fine tune the fit.
|
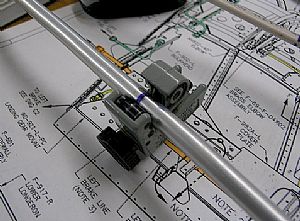
 Forming the fuel line Forming the fuel line
I used a spring pipe bender to form all the curves in the fuel line. The spring does a good job in preventing kinks in the pipe.
|
 An inside view of the pipe bend session An inside view of the pipe bend session
|
 Nice bend (if I do say so...) Nice bend (if I do say so...)
|
 Made the bends and the final cut Made the bends and the final cut
I made sure to put the fittings on first before making the flare on this end of the pipe.
|
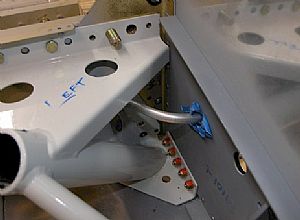
 A jump to the future A jump to the future
Here I have both fuel lines run with the flares in place. You'll notice that the left line is a little shorter than the right one. That's because Captain Dumbass forgot to put the fittings on before making the flare on the end of the left tube. Here's where the mini tube cutter saved my ass. Read the next entry...
|
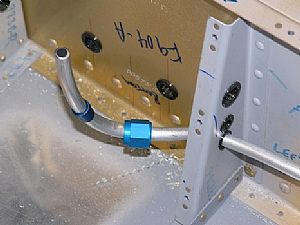
 Cut off the boo-boo flare Cut off the boo-boo flare
The Mini pipe cutter has slot in the roller wheel which allows for the flare to fit inside the roller. This feature allows you to easily cut off a boo-boo flare. Ain't that cool?
|
Home Previous Entry Next Entry Back
|


