RV-9A: Electrical - Part 2 - 1/22/2012
Home Previous Entry Next Entry Back |
Share on:

|
|
 Time to test the Comm, Intercom, Push-to-talk switches and the headset plugs Time to test the Comm, Intercom, Push-to-talk switches and the headset plugs
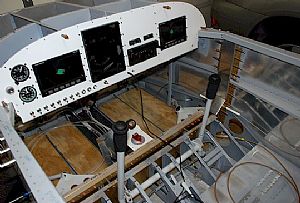
This is the spooky part. After running the wires and hooking everthing up, it was time to see if I did everything right. I temporary hooked up the battery to the electrical system. I used a temporary wire with a clamp on each end to connect the positve post to the positive main cable. This temporary wire has a fuse in-line in case something goes wrong.
|
 A now for my listening pleasure... cross yer' fingers A now for my listening pleasure... cross yer' fingers
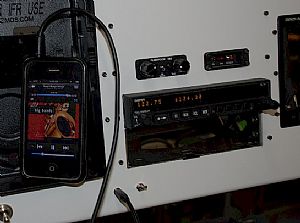
Here's all the goodies. My Garmin SL40 Comm, the FlightCom Intercom, a plug for an MP3 player and a switch for an external speaker. I chose some tunes from 40's, recorded by the BBC Jazz Orchestra to test the music plug.
|
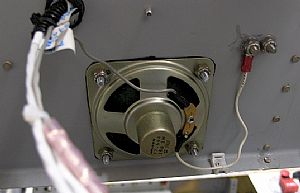 Here's my external speaker for listing to the SL40 Comm ouput Here's my external speaker for listing to the SL40 Comm ouput
What the heck happened to Radio Shack? I looked far and wide for a small radio speaker without any luck. I asked the pimple-faced kid (with his pants swung low around his butt) at my local Radio Shack where the speakers were, and he said "Oh, we don't sell speakers anymore". WHAT?, you are kidding me! So I looked around my garage and found an old (and I mean really old) CB radio on the shelf and removed the speaker from it. Perfect! I bought a small toggle switch to go on the panel next to the MP3 plug to turn the speaker off and on.
|
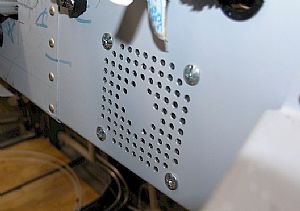 Here's the flip side Here's the flip side
I scratched my head for a while trying to figure out how drill the holes for the speaker in the sub panel directly behind the main panel. Keep reading...
|
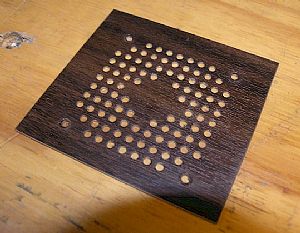 Here's the solution Here's the solution
Since the CB went "belly up" many years ago, I decided to sacrifice the outer case of the CB to make a template out of the outer case to drill the holes in the sub-panel for the speaker. I drilled the four outer holes into the sub-panel and clecoed the template in place. Then it was just a matter of drilling the holes using a 1/8" inch drill bit. The CB outer case was made of heavy metal, so I will be able to use this template again.
|
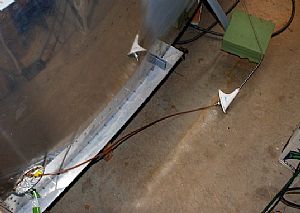 Time for the test Time for the test
I ran the coax cable outside the fuselage through the large hole on the side and hooked it up to my new whip antenna.
|
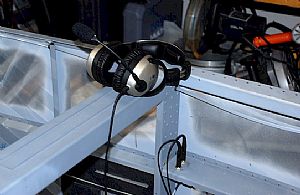 Here we go... Here we go...
I hooked up my Lightspeed headsets turned everything on. HEY, it works!! Time for a beer. One thing though, don't put your antenna inside the fuselage when trying to transmit. Two words - FEED-BACK! Ouch.
|
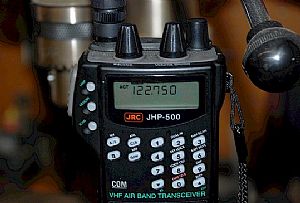 Checking the communication end Checking the communication end
I sent my kiddo out into the neighbor's yard with this radio to test the push-to-talk switch on each stick. The communication was loud and clear on each end. On to the Transponder!
|
Home Previous Entry Next Entry Back
|


