RV-9A: Left Fuel Tank - 4/29/2006
Home Previous Entry Next Entry Back |
Share on:

|
|
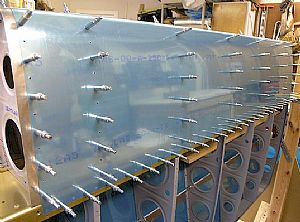 Finished final drilling the Leading Edge assembly Finished final drilling the Leading Edge assembly
My kiddo helped finish this part off. He moved clecos while I drilled away. Now it's tank time!
|
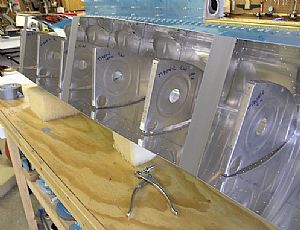
 Time for the tank wrestling match Time for the tank wrestling match
I wasn't looking forward to this part. Namely trying to the get the ribs clecoed to the tank skin. Doing the leading edge skin to the ribs was pretty tough, but it looks like the tank skin is even thicker than the leading edge skin, which will make it more difficult to work with. I figured that the most critical clecos to get in first would the first ones on each side of the skin at the forward most position. So I decided to bring the mountain to Mohammad and used Aircraft Adhesive (duct tape) to bring the skins down to where I could easily put in the first cleco in the ribs on each side. In this picture, I put the first row of clecos in on the top side of the tank skin.
|
 Clecoed the first row of holes on the other side of the skin Clecoed the first row of holes on the other side of the skin
I grabbed a couple of 4 inch foam rubber chunks and lifted the tank off the work bench, then pulled the tank front edge over the edge of the work bench so I put in a row of clecos in the first rib holes on the other side of the tank skin.
|
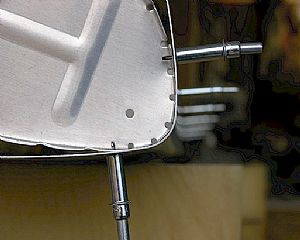
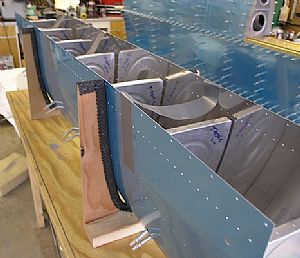
 An inside shot of the ribs with the first two holes clecoed An inside shot of the ribs with the first two holes clecoed
I think this is going to work! Now all the ribs are clecoed in down the line with the first two holes clecoed to the skin.
|
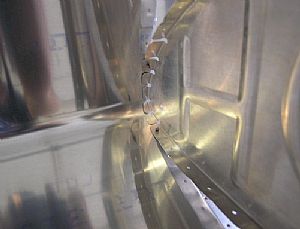
 The experiment continues The experiment continues
Then I decided that I need to put another row clecos in to start bringing the skin into position. I pulled the tape loose on one side and closed the skin down a little more, lining the second holes in the ribs up with the skin. Then I taped it all back down again.
|
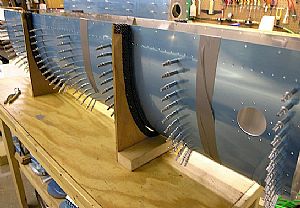
 Put in the second row of clecos Put in the second row of clecos
Here, I stood the skin/ribs up and easily put the second row of clecos in. Now for the jig!
|
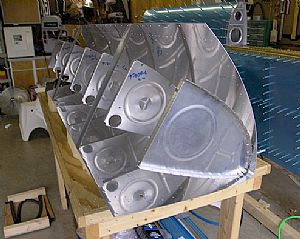
 Plopped that dude into the jig Plopped that dude into the jig
This is gonna work! Now it was just a matter of putting in the rest of the clecos.
|
 TADAH!!! TADAH!!!
I'm glad that's over with. The only thing that kind of bugs me is the fact that these ribs fit so tightly against the skin, that they actually push small dents into the exterior of the skin. Oh well, I guess the paint will hide it somewhat. In a way, I'm glad that I'm doing one wing at a time. The right wing will require a lot less "head scratching". Tomorrow I will start on the tank stiffeners. UPDATE 8/8/2006: Turns out the dents aren't really dents. I noticed after dimpling everything and riveting the ribs in place, I don't see the dents in the skin anymore, where the ribs push on the interior of the skin. Dimpling must relax the fit.
|
Home Previous Entry Next Entry Back
|


