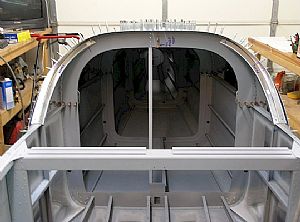
RV-9A: Top Skins and Baggage Area - 8/11/2009
Home Previous Entry Next Entry Back |
Share on:

|
|
 Time to fit the F-6111 Ribs Time to fit the F-6111 Ribs
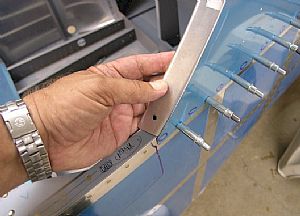
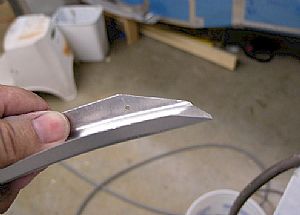
Coming back fully charged from a week at AirVenture 2009, I'm ready to really "Gitter' done" on my RV. BUT, the next step is to fit the F-6111 ribs, which is a real head-scratcher. The instructions weren't much help, and I have to admit that after I got these dudes fitted, I wouldn't know how to describe their installation either. Here, in this first picture, I've pulled the rib out to the edge of the top skin just to get an idea of how this rib is going fit in the curve of the skin.
|
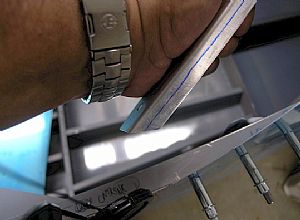 Time to trim and mark the outer flange of the rib Time to trim and mark the outer flange of the rib
I marked the center line of the outer flange of the rib so that the line will show through the pre-drilled holes on the outer skin. I also trimmed the bottom end of the flange to match the angle of the longeron upon which it sits.
|
 Time to start fittin' and drillin' Time to start fittin' and drillin'
I started at the longeron and worked my way up, drilling and clecoing, using the line drawn on the flange as my guide, until after drilling the 3rd hole, and the line disapeared. I took the rib off and put a single flute above the 3rd hole in the rib flange. Then I was able to drill and cleco for several more holes.
.
|
 Working my way up Working my way up
I was able to put in 5 more clecos until the line drawn on the flange disapeared again. I removed the rib again and put in one more flute. Then I was able to proceed towards the top. When I got to the last few holes, I had to remove the rib once more and put a final twist in the top of the rib so that the flange would lay flat against the skin.
|
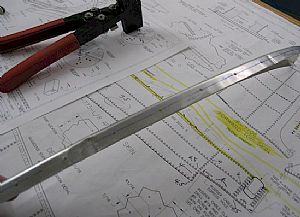 Here's the rib after the fitting Here's the rib after the fitting
It looks like a sick snake, but it fits perfectly. Now it's time to trim the top end of the rib so it will fit flat against the bulkhead.
|
 Here are the cuts on the top end flanges Here are the cuts on the top end flanges
The main web on this end did not need trimming, only the flanges needed trimming to match angle of the bulkhead.
|
 Here's another view of the top of the rib Here's another view of the top of the rib
You can see how the rib will now fit flat against the bulkhead.
|
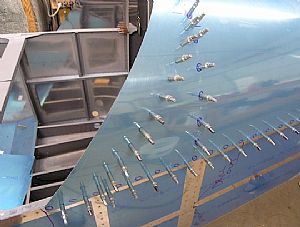
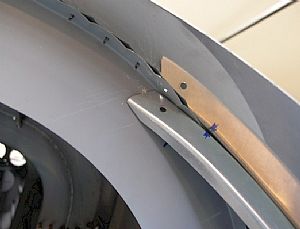 Good fit Good fit
Here's the F-6111 rib totally drilled and clecoed into place. One note: The blue mark on the rib indicates where I had to put in yet another small flute to allow space for the flute already in the bulkhead flange.
|
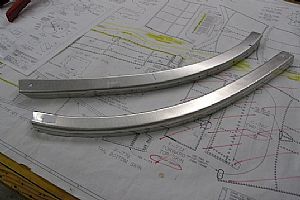 Time make the other flange Time make the other flange
Piece of cake, I just used the first flange as a pattern and made all the cuts, flutings and twistingd in reverse and the rib went into place without any fuss at all.
|
 Thar' tis... Thar' tis...
Finito.
NEXT.. I ordered some soundproofing material from Aircraft Spruce to put in the cabin. Now the fun begins, and I mean real FUN!
|
Home Previous Entry Next Entry Back
|


