RV-9A: Left Elevator - 2/8/2006
Home Previous Entry Next Entry Back |
Share on:

|
|
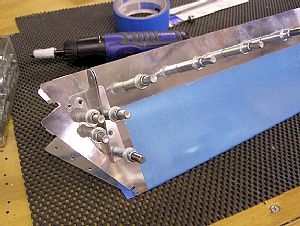 Started work on attaching the Trim Tab Horn Started work on attaching the Trim Tab Horn
The instructions say to rivet the Trim Tab Horn to the Trim Tab skin. This seemed a little weird to me, knowing that I would have to bend the skin end tabs at some point. The Trim Tab Horn would definitely get in the way doing the skin bends. Oh well, I'm going to follow the instructions. I clecoed on the trim tab horn and the spar and drilling out the holes in the trim tab and one hole to the left of trim tab horn.
UPDATE - 2/9/2006: As you will see on the next entry, I should have bent the end tabs first and then attached the control horns. I can see that riveting on the control horns would be difficult after the tabs where bent, but not as difficult as bending the end tabs after the control horns are attached.
|
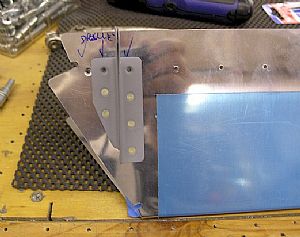 Riveted on the Trim Tab Horn Riveted on the Trim Tab Horn
The instructions don't warn you to not rivet the 2 forward most rivets. These rivets will be put in when the spar is riveted to the skin. You'll notice that I went ahead and dimpled the hole in the skin to the left of the trim tab horn. There's no way to dimple that hole with the trim tab horn attached.
|
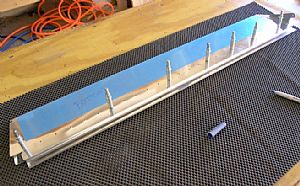 Did the aft end Trim Tag Skin bend Did the aft end Trim Tag Skin bend
I used my hinged 2x6 boards to put the bend on the aft end of the trim tab skin. I checked the bend by clecoing on the spar. Looks OK.
|
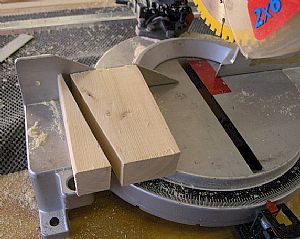 Started work on bending the end tabs of the Trim Tab skin Started work on bending the end tabs of the Trim Tab skin
I grabbed an old 2x4 and put a 10 degree angle cut in it with my miter saw. Then I cut across the 2x4 freeing up the 2 pieces to be clamped onto the skin for bending the tabs.
|
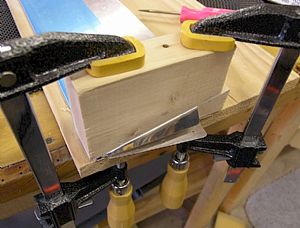 Started the bend on the bottom tab Started the bend on the bottom tab
I lined up the edge of the board flush with the two ends on each side of the tab and clamped everything down. Then I took a 1x4 board and pushed the tab over using the end of the board. I bent it as far as it would go. Now for the rivet gun to finish it off.
|
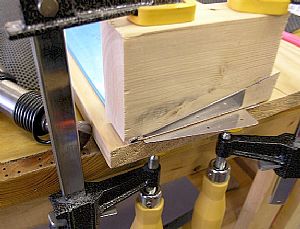 Finished off the the bend with rivet gun Finished off the the bend with rivet gun
I had heard that reducing the pressure on the rivet gun was a good idea. I set the pressure at 20 lbs and found the bend easy to do and very controllable. I moved the mushroom head on the rivet gun back and forth across the bend until I got a uniform bend, being careful not to hit the lower tab.
|
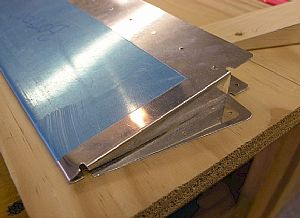 Phew!! Glad that's done! Phew!! Glad that's done!
The bend turned out pretty good. Now for the other side.
|
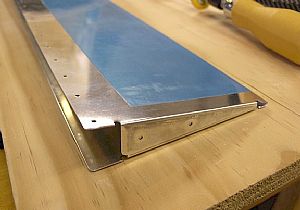 Finished! (on one side anyway) Finished! (on one side anyway)
I flipped everything over and did the same thing on the other side. I think it turned out fine. Now I have to figure out how to bend the other side of the Trim Tab skin. I will have to carve out the 2x4s to go over the trim tab horns, so I can make the tab bends.
|
Home Previous Entry Next Entry Back
|


