RV-9A: Ailerons - 8/5/2007
Home Previous Entry Next Entry Back |
Share on:

|
|
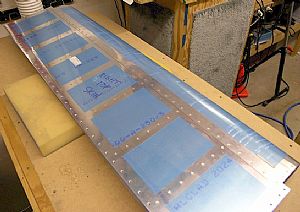 Riveted the leading edges to the top skin and spar Riveted the leading edges to the top skin and spar
The learning curve on something new like this part can be a real pain in the bahootie. Usually after about 3 to 5 rivets I've got the technique down for the rest of the session. But those first 3 or 5 rivets can wreak havoc. Overall it turned out real nice.
|
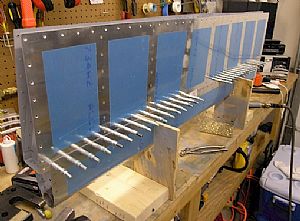 Started riveting the bottom Started riveting the bottom
This should go a lot faster. You'll notice that the jigs are fastened to the work bench with wood screws. This really gives a solid feel to the riveting session. I used my regular flat bucking bar and mushroom rivet set for the majority of these rivets.
|
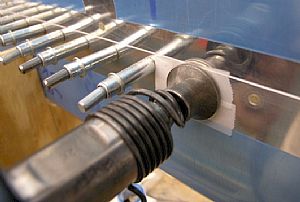 Lesson learn on those first 3 to 5 rivets Lesson learn on those first 3 to 5 rivets
I notice that I had to keep the mushroom head edge even with the edge of the leading edge skin. When the mushroom wanders over the edge of the leading edge skin, it puts dents in the thin flat top skin. Damn it!! Oh well, the rest of the rivets will look perfect. Filler please...
|
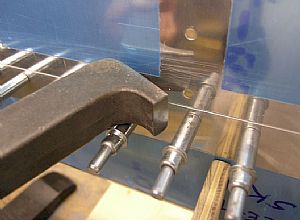 Problem rivets Problem rivets
There are 4 rivets on each side of the aileron where a regular flat bucking bar won't fit because of the stiffeners on the inside of the top flat skin. I had to fabricate my own special fitting bucking bar in order to buck these rivets. It took me about an hour to grind this dude down with a grinding wheel and then smooth it over with the the scotchbrite wheel. The results were perfect for these problem rivets.
|
Home Previous Entry Next Entry Back
|


