RV-9A: Forward Section - 1/28/2009
Home Previous Entry Next Entry Back |
Share on:

|
|
 Making the conical bends on the F-970 skins Making the conical bends on the F-970 skins
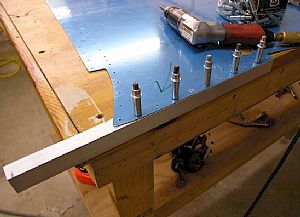
I have been dreading this part. Kind of like going to the dentist, but you know you have to go. The instructions say to find a scrap piece of AA6-125 angle to use to make the bend. I started to look through that giant pile of parts and decided to just go to Lowes and get a piece of 3/4" x 3/4" aluminum angle to use. After some head-scratching I determined that I needed to drill holes in the angle piece on both sides for both sheets, just to get that part out of the way.
|
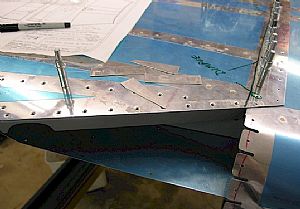
 Made the first bend Made the first bend
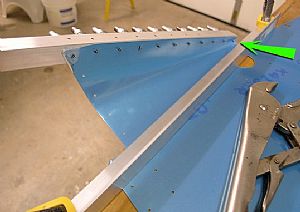
There two types of bends made during this single bending process, one is straight up 90 degrees one end and a gentle curve on the other end. The green arrow shows end where the bend attempts to form a flat flange at a 90 degree angle to the side of the skin. This is where I applied pressure with my thumb. The opposite end is a different story. I used a visegrip to rotate the scrap angle piece, making a gentle and uniform curve in the skin. The final product "should" be pseudo flange to cleco onto the bottom of the fuselage.
|
 The final product The final product
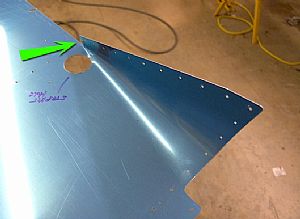
My initial attempt at making first bend went OK but not as nice as the second. It's kind of like marriage, you have to screw up the first one to get the second one right. The one thing that I noticed on both bends is that there is no way to get the small 90 degree to make a perfectly flat flange. it wants to curl during the bend, even with the thumb pressure attempting to push that dude over for a perfect 90 degree angle. The opposite end curving bend with the visegrip turned out to be the easy bend. I had to use my hand seamer to gently flatten out the end of the flange, shown by the green arrow in the picture. I know that when I dimple these holes that it also help to flatten the flange on this end as well.
|
 Tried it on for size Tried it on for size
I had to make a few adjustments with my hands, but over all it fit just fine. Phewww!
|
 On to the F-623A Rib Attach Strips On to the F-623A Rib Attach Strips
I made these dudes a long time ago and put them into a zip-lock back for safe keeping. Now the instructions say to make them. Yeah, one less thing to make!
|
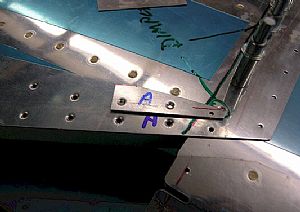 Drilled the attach strips Drilled the attach strips
I held one of the aft F-623A attach strips under the skin and inside the F-623 rib and marked the center with fine point sharpie though the outside skin rivet hole. Then I pulled out the attach strip and drilled a single hole where the mark was with my drill press. After clecoing the attach strip back into place, I drilled the other 2 holes using the the outside skin as drilling guide. Then I dimpled the holes.
|
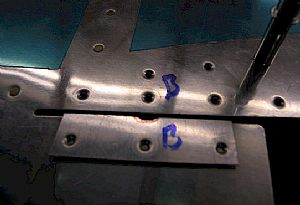 Now for the other end Now for the other end
Same song and dance here as far as placement and drilling.
|
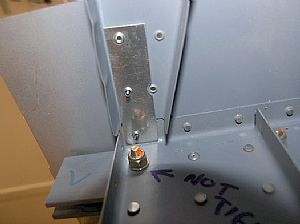 Done! Done!
You'll notice that there is notch that I had to make to get around rivet hole, to make the strip fit flat.
|
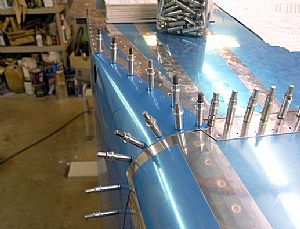
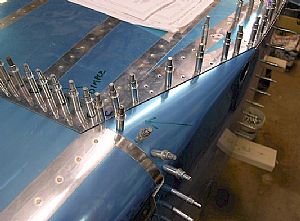 Put the side skin back on Put the side skin back on
This is really looking good (if I say so, and I DO!). It's a nice fit. Later when I dimple the side skin, the outside skin will fit even better.
|
Home Previous Entry Next Entry Back
|


