|
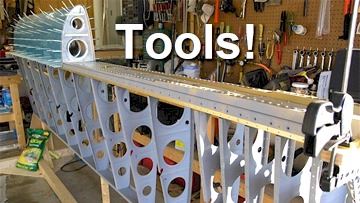
My Tools (a work in progress) |
|
|
|
|
 A Brain
A rarely used tool by some builders, as we have seen by reading some of the goodies on the
on the RV email groups. Be ready to ask for help from other builders and to learn how to think outside the box.
|
 Non-Oiled Compressor
I bought this 30 gallon compressor without checking the RV email groups first. D'oh!
The motor and compressor are one unit and do not require oil. A 30 gallon compressor
can handle just about anything your want to do. BUT, this sucker is
incredibly loud and get's overheated easily.
|
 Oiled Compressor
This is the compressor that I should have bought. The motor requires oil to be added to it
occasionally and drives the compressor unit with a belt. I'ts much quieter and lasts
longer than the non-oiled compressor. The cost is about the same as well. I'll get one when
I build my next RV.
|
 Compressor Sound Proofing Box
Since I am using the "non-oiled" compressor, I decided to create a sound proof box to control the noise it makes. I found this drawing on the
Internet. I lined the inside of my sound box with a foam rubber mattress cover that I got from Target. My neighbors say that they can't hear the
compressor at all. The rivet gun is another story however.
|
 Air Regulators
You'll drive yourself nuts changing your air driven tools out and resetting pressures. This setup allows
you to have a air hose for drilling, one for painting and one for riveting, without having to do much else.
|
 Reversible Pneumatic Drill
I got this pneumatic drill at Home Depot for around fifty bucks and it works fine. Electric drills
just don't get the high RPMs that need for working with metal.
|
 Drill Bits
I bought a bundle of #40 Drill Bits (for 3/32" rivets) and #30 Drill Bits (for 1/8" rivets), which are the bits you
use the most. I only bought a couple of #19 Drill Bits and #12 Drill Bits.
|
 Unibit 1/4" - 3/4" by 1/16ths
This Unibit is a great way to make big holes in a hurry without beating your material (or yourself) to death.
|
 12 Inch Drill Bits
I have some #30 and #40 12 inch drill bits (3 of each). These long (flexible) drill bits come in handy when your
drill gets in the way or you need to drill "around the corner".
|
 Microstop Countersink
Some rivets and screws have to be put in flush with the surface you're working on. This cool tool allows you put in multiple countersinks that are all the
same depth, thanks to the adjustable cage around the countersink bit. It's used with a pneumatic drill.
|
 3X Rivet Gun
I ordered this 3X Rivet Gun from Aircraft Spruce.
I have heard that some builders ordered a 2X Rivet Gun (which doesn't hit as hard as the 3X) and then had to
order the 3X Rivet Gun to get the punch they needed for the larger rivets.
|
 Bucking Bars
These are main bucking bars I use, especially the one on the left. I got them from Aicraft Tool Company.
I cut the one on the right in half to use on the trim tab spar and a lot of other tight places. The scotchbrite wheel does a good
job on smoothing the edges and faces of any prospective bucking bar.
|
 Skins Bucking Bar
This bucking bar was made especially for back riveting skins.
You can get it at Cleveland Aircraft Tools.
If the page doesn't come up, just press the Refresh button on your browser to see the page.
|
 Pneumatic Rivet Squeezer
I know I could have built the whole aircraft with a hand squeezer, but this dude makes life much easier and does better job of
squeezing rivets than I do.
|
 Bench Grinder
I got this bench grinder from Lowes (aircraft and lumber supply). I mounted my scotchbrite wheel
on one side and removed the other wheel from the other side. It makes it easier to deburr the aluminum
with the other wheel out of the way.
|
 Scotchbrite Wheel
The Scotchbrite wheel comes handy when "breaking" the edges of the various aluminum parts, are which quite sharp.
Usually one swipe of part edge over the wheel smoothes it down quite nicely.
|
 Benchtop Band Saw
Gotta' have this one! Cutting aluminum parts is big part of building the RV. I put an 18 TPI metal cutting bansaw
blade on it (18 teeth per inch).
|
 RV-10 Back Rivet Set
This LONG back rivet set was designed for the RV-10 but works great for rivets that are difficult to get to. I used it when riveting on the first wing skins,
but wasn't as happy with the outcome as I was by using the old fashion mushroom head on the rivet gun with a bucking bar from behind on the second wing.
I think I got it at Avery Tools.
|
 Hand Seamers
Most times the flanges on the ribs are not at a perfect 90 degree angle, so you will need these puppies to straighten
everthing up. They ain't cheap! You can get from an aircraft tool dealer, but Home Depot has the same for LOT cheaper.
|
 Assorted Dimple Dies
These little dudes are expensive, butcha' gotta have em'. The ones shown here are a 3/32", 1/8", 5/32"and 3/16" Squeezer Set; a 1/2" and 3/8" Flush
Squeezers; and 3/32", 1/8", 5/32" and 3/16" Dimple Dies. If you're just starting out on a tail kit, you only need the 3/32" and 1/8" sets. Check Van's
Required Tools page for a complete list.
|
 Small Diameter Female Dimple Die
When it comes time to dimpling the flanges on most ribs, the regular dimple die is too wide and actually bends the
flange on the rib, pushing out away from the web of the rib. This special dimple die solves that problem. Almost all
aircraft tool dealers carry them. I have a 3/32" and a 1/8".
|
 Fuel Tank Dimple Dies
These dimple dies make a dimple that is a little deeper than a normal dimple die that supposedly makes the seal around the fuel tank rivets a little
tighter. Some builders use them, some don't. I used them because someone else told me to. "OK, I with you fellers".
|
 Pop Rivet Dimple Dies
These dimple dies are handy in tight places where you can't get a regular set of dimple dies to fit
in a tight situation. I also use them to staighten out "bad" dimples that are sometimes made by the
"C" Frame dimple whacker.
|
 Clecos
Clecos "bring it all together", holding parts tightly against each while you're getting ready to rivet.
These four clecos sizes are used the most on the RV as shown in the picture. They are the 3/16" cleco
(Brass color - for a #10 drill bit hole), the 3/32" cleco (Silver or Cadmium color - for a #40 drill
bit hole), 5/32" (Black color - for a #20 drill bit hole) and the 1/8" (Copper color - for a #30 drill
bit hole). I have about 1,000 silver (3/32") clecos so far, about 200 copper (1/8") clecos, and a dozen
or more of the brass (3/16") and black (5/32") clecos.
|
 Cleco Pliers
Cleco pliers are used to place and remove the spring loaded cleco fasteners and clamps. I have three pair.
One at the hangar and two in the garage (the other hangar), just in case my son wants to help. There are
pneumatic cleco pliers available for those who don't want the hand exercise.
|
 Scotch-Brite Hand Pads
I used these pads on places where the instructions call for me to "rough up" a surface to allow for fuel tank sealant adhesion.
|
 3M Sponge Sandpaper
These sponge sandpaper products work great at rounding off the edges of the aluminum where you can't use
the Scotchbrite wheel, especially inside the lightening holes in the ribs. I also use regular 320-400 grit
wet/dry sandpaper to finish off the edges that are "broken"(roughly rounded) by the Scotchbrite wheel.
The pink sponge in the picture is an ultra thin sandpaper sponge that allows me to get between the rib
flanges on the corners.
|
 Avery Shop Head Rivet Gauges
These guys come in handy when your checking to see if your rivet is set properly. There are 4 gauges in the
set, one for each rivet size typically used to build an RV.
There are two terms you will need to know. One is "manufactured head" which the factory made head of the
rivet, and the "shop head", which is made by you, the builder. The hole of the gauge is
placed over the shop head of the rivet (the part you just flattened). If the shop head goes up into
gauge hole, you didn't flatten the rivet enough, try again. The notch cutout on the other end of the
gauge checks to see if you flattened the rivet too much. If the notch can go over the flattened
shop head of the rivet without touching it, you flattened it too much and the rivet will need to
be drilled out and a new one installed.
If the notch hits the shop head and won't go over it, you're good to go. All you need to do to make sure your
rivets are just right, is to satisfy the requirements of each end of the gauge for that particular rivet size.
After you have more experience with riveting, you will be able to just look at the rivet and know
whether is is acceptable or not.
|
|