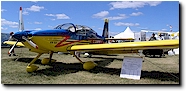
Howdeeeeee! I'm building an RV-9A from
Van's Aircraft
. Take your shoes off and sit a spell.
Howdy Ya'll
Do what yer' Momma said...
Go Play!
Disclaimer
This website contains Affiliate Links. Please read the
Disclosure
for details.
Navigation
Homepage
Log Search
RV How-to Videos
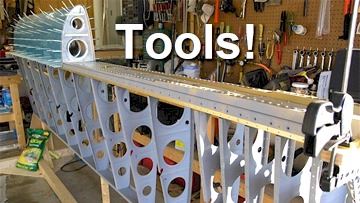
RV TOOLS & BOOKS!
Places to FLY your RV!
RV Related Videos!
RV Resources
Become a PILOT!
RV-7/9 Drawings
ID:
Pswd:
RV Construction Log
Preparation
Empennage
-
Horizontal Stabilizer
(49:40)
-
Vertical Stabilizer
(21:15)
-
Rudder
(32:15)
-
Right Elevator
(35:45)
-
Left Elevator
(30:50)
Wings
-
Inventory & Setup
(9:30)
-
Left Wing Prep
(54:30)
-
Left Fuel Tank
(45:20)
-
Left Wing Skins
(46:10)
-
Right Wing Prep
(34:15)
-
Right Fuel Tank
(47:50)
-
Right Wing Skins
(40:15)
-
Ailerons
(54:30)
-
Flaps
(40:30)
-
Rods and ends
(18:45)
Fuselage
-
Fuselage Parts List
-
Inventory and Setup
(7:15)
-
FireWall
(14:30)
-
F-704 Bulkhead
(13:25)
-
F-705 Bulkhead
(14:20)
-
Other Bulkheads
and Longerons
(17:30)
-
Tailcone
(29:30)
-
Center Section
(35:15)
-
Forward Section
(52:40)
-
Forward Assembly
(24:30)
-
Skins/Baggage Area
(46:30)
-
Seats & Seat Floors
(30:15)
-
Flaps & Gear Mounts
(18:15)
-
Fuselage Plumbing
(14:0)
-
Tail Feathers
(16:35)
-
Front Deck/Firewall
(58:50)
Finish Kit
-
Electrical
(57:30)
-
Electrical Part 2
(24:0)
-
Canopy
(22:30)
-
Landing Gear
(18:35)
How I Did Stuff
Pop-Rivet Dimpler 101
My Wing Jig
My Wing Cradle
Wing Cradle Mod
Tilting Tank Jig
Delrin Aileron Stops
Nutplate Preparation
Fiberglass 101
Save Your Skin!
Events and News
Aviation Events
Aviation Events Around Texas
Fun Places To Fly in Texas
Aviation News
RV Groups & Support
Rivet Bangers
Van's Air Force
RV Information
How to Land an RV
Van's Aircraft
RV Resources
RV Photo Album
RV-7/9A Drawings
Nut & Bolt Torque Values
Misc Goodies
Fuselage Parts List
How to Land an RV
My Tools
Fix a Heavy Wing
Paint Possibilities
My Favorite Videos
Share on ....
More Videos!
Cool Stuff