| My Favorite Videos |
|
|
Van's Aircraft RV-9A - Installing the Landing Gear - Part 1 - FunPlacesToFly.com
Share on:

 I'm building an RV-9A from Van's Aircraft. It's what aircraft builders call a 'slow-build', meaning that everything comes delivered in kit form and I have assembly it. Some kits have pre-assembled sections like the fuselage or wings, but I chose to build everything myself (it's a lot cheaper that way).
The RV-9A is a 2-seat all-aluminum airplane, designed to be an easy-to-fly, economical and versatile aircraft. It has an average cruise of about 180mph and only burns about 7.5 gph, with a O-320 Lycoming engine. It was designed for day-to-day flying, local trips and short cross-countries, with occasional long flights. Thanks to it's larger wings and long slotted flaps, even low time pilots find it easy to fly and land. Unlike it's sister aircraft, the RV-7A, the RV-9A it is not aerobatic. That's OK with me, since I like the contents of my stomach to stay where they are.  | It's time put the landing gear on my Van's Aircraft RV-9A. The first item on the agenda is to bolt on the Engine mount, which holds the front nose gear. I've already gone as far as I can with the electrical portion of the project; that is until I get the engine. Then a whole new episode of wiring adventures begin. Here I've finished bolting the engine mount on with the recommended torque settings and installed the cotter keys. |
 | All three gear legs are powder coated to prevent rust. There are two unprotected areas where the metal of the gear meets the metal of the engine and main gear mounts. In order to prevent rust, I'm putting some axle grease on these areas. It also helps in the sliding of these dudes into position, since it's such a tight fit. I got this small packet of axle grease from Pep Boys Auto Supply. |
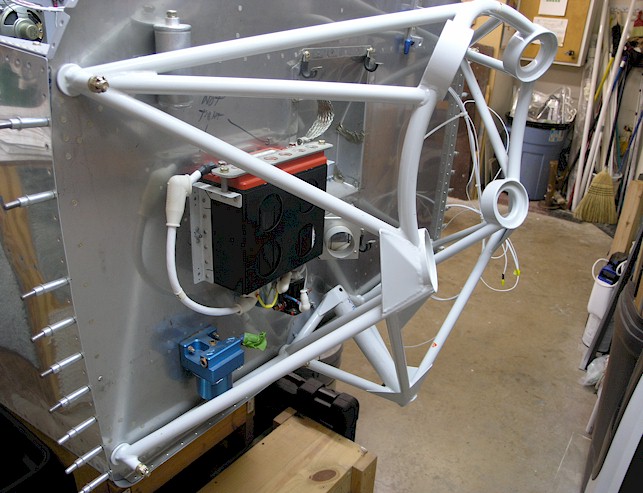
 | Here I've slid the nose gear into position and bolted it in place. This required the use of a special all metal lock washer to prevent the bolt from coming loose. In order to get the bolt in, I had already reamed out the hole in a previous building session, with a special reaming tool that I bought from Avery's Aircraft supply. |
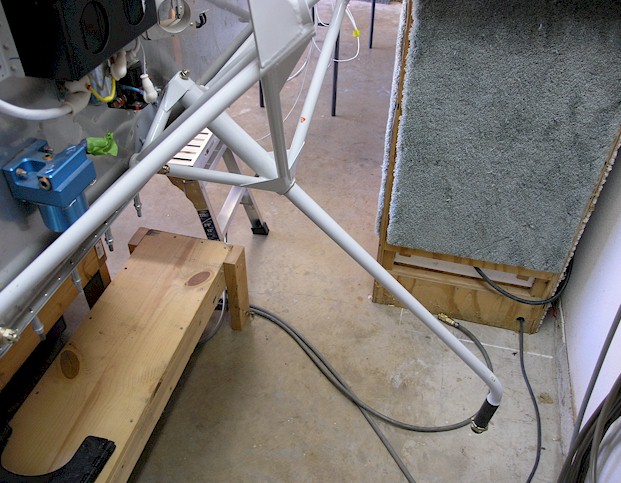
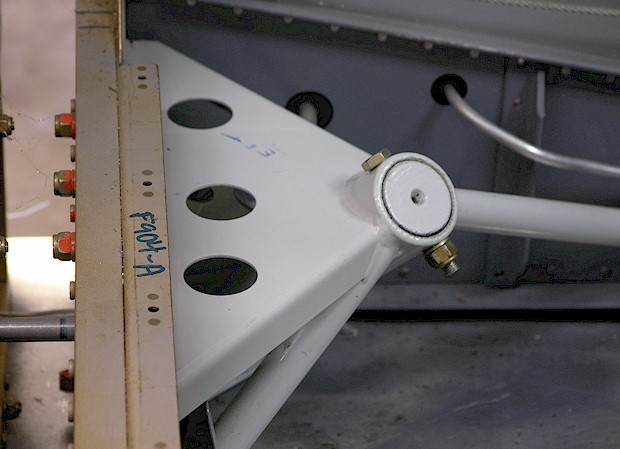
 | Here I've put one of the main gear legs into position. After I get the bolt hole lined up with the pre-existing bolt hole in the gear leg mount, I will need to ream out the hole like I did with the nose landing gear. You'll notice that I have the fuselage up off the floor and laying on top of my 3' x 6' work bench. This little endeavor took myself and two other friends to get it up on the bench. |
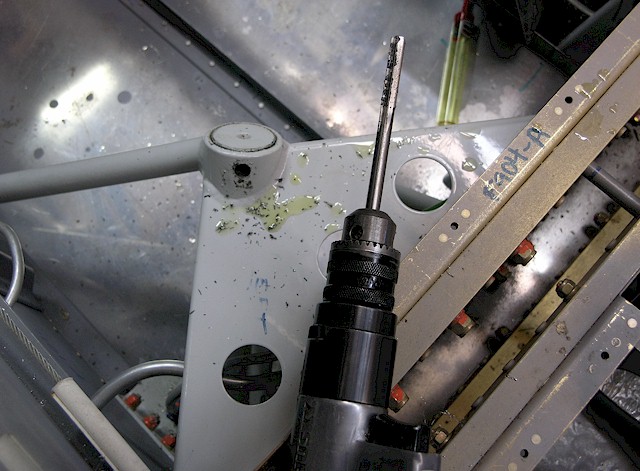
 | Next comes the 'reaming of the hole' which is needlessly to say, a little nerve racking. I had to using a high speed cutting wheel to shorten the reaming bit in order to get the drill into position for the reaming. Turns out I was supposed to ream this hole a long time ago when the external skin of the fuselage wasn't riveted on. To line up the holes, I stuck the reaming bit into the hole by hand and forced the two holes to line up for the final reaming with the drill. After totaling immersing the bit and the hole with oil, I slowly reamed this dude out. PHEW!! |
 | After reaming out the hole, I removed the gear leg and cleaned off all the metal shavings, re-greased the unprotected areas of the gear leg and put it back into position on the fuselage. Then, after a typical long search for the bolt, washer and lock nut, I installed the bolt using the torque settings in the instruction manual. Then I did same procedure on the opposite main gear leg. |
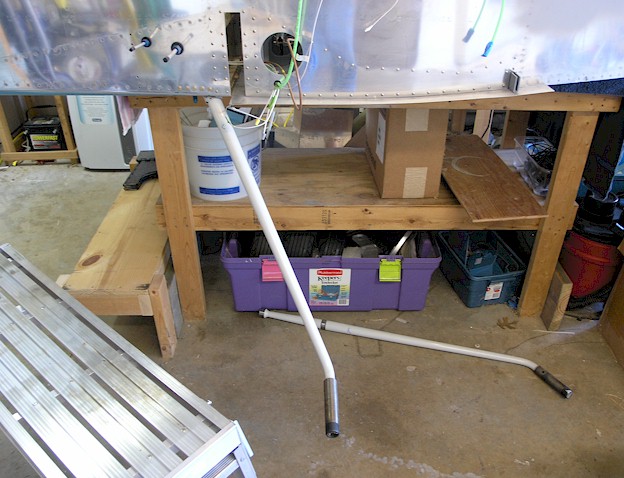
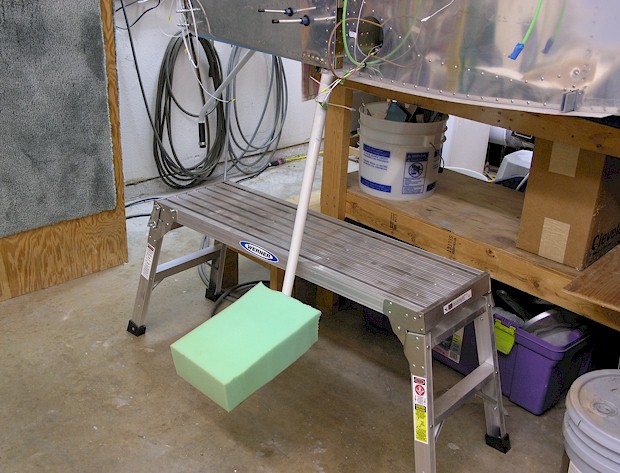
 | One lesson I learned from the metal step-up on the fuselage, is that it hurts when you bang your shin on a large metal object sticking out where you're walking. So I went to the local Arts and Crafts store with my wife and found these hunks of foam rubber. I sliced a whole down the middle of the foam rubber and made booties for the gear legs. The bright green color also brings your attention to the impending doom of a bruised shin. |
Visit my RV-9A Construction Website
Share on ....


More Videos!
|
|
|