|
Home - RV-9A: Left Wing Skins
|
|
|
 9/15/2006 - Back to work on the left wing. Allright!
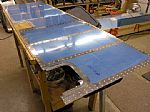
Hmm� What was I working on when I left this thing? Here I removed the top skins to start deburring and dimpling the rivet holes in the ribs and skins. I used my sharpie to mark the holes on the outer ... read more
|
 9/18/2006 - Getting ready to dimple W-902 (inboard top skin)
Here�s my dimplin� table. It ain�t fancy, but it�ll work. The 2 chunks of four inch foam rubber just happen to be the same height as the top of the female dimple in the C Frame dimpler, which make the ... read more
|
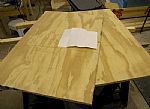
 9/21/2006 - Finished dimpling and sanding the inboard top skin
To break the edge of the skin, I have 1x2 block of wood with some 180 grit sandpaper on it. I lightly sand the edges of the skin on a 45 degree angle and then come back with some 400 grit sandpaper to ... read more
|
 9/22/2006 - Started work on the bottom skins
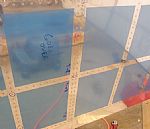
Here I have removed the blue stuff from the W-905-L bottom wing skin and started dimpling the holes, after deburring everything. There's nothing like working in your garage on own your airplane with P ... read more
|
 9/24/2006 - Finished deburring, dimpling and sanding the bottom outboard skin
As I've said before "Datsa' lotta' holes!". This skin is ready to put away until needed. ... read more
|
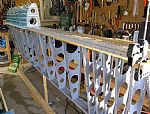
 9/25/2006 - Deburred, dimpled and sanded the J Stringers
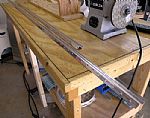
The "J" stringers go behind the top skins of the wings and run through the middle of each rib. They provide stability to the lateral middle section of each skin. ... read more
|
 9/27/2006 - Finished dimpling the ribs
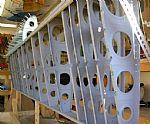
I used my Avery hand squeezer and went at it. Dimple, dimple, dimple. When I finish, I always make it a habit to go back and run my finger over every hole to make sure I didn't forget any. Sure enough ... read more
|
 9/29/2006 - Mystery rivet solved!
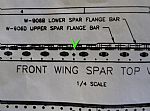
A fellow RV builder emailed me and gave me the solution. Apparently the "plus" sign shown on the drawing indicates a AN426AD3-4 rivet, which is a flat head rivet, which will require me to countersink ... read more
|
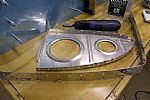
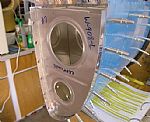 9/30/2006 - Started work on installing the nutplates on the W-919 splice plate
This splice plate gives support to the tank skin which will sit on top of it and help snuggle the tank up to the outboard leading edge skin, for a nice transition down the leading edge of the wing. He ... read more
|
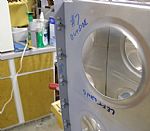 10/3/2006 - Finished work on installing the nutplates on the W-919 splice plate
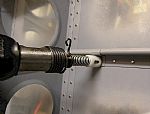
After dimpling and hand countersinking the rivet holes in the rear wing spar, it gave me a new idea on how to prepare the nutplates for the splice strip. Below are the steps I used to dimple and count ... read more
|
 10/5/2006 - Time to start riveting the leading edge assembly together
Well, not yet. I still have to debur and dimple all of the ribs and the wing skin. All the instructions say to do at this point is "Rivet the Leading Edge Assembly". So it's time for me use my poetic ... read more
|
 10/6/2006 - Deburred, dimpled and primed 3 more ribs on the leading edge assembly
So far this is working out OK, but only because I�m using the pop-rivet dimplers on the skin. Otherwise I would have to take everything apart and use the C-Frame hole whacker. ... read more
|
 10/9/2006 - Finished deburring, dimpling and priming the leading edge assembly
Time for them rivets! ... read more
|
 10/10/2006 - Finished riveting the Leading Edge Assembly
On the previous day, I put in one rivet in the aft end of the leading edge assembly all the way around with my hand squeezer, then put in 2 more rivets all the way around with the 4 inch no-hole yoke ... read more
|
 10/11/2006 - Riveted the Leading Edge Assembly to the wing spar
Wow, what a job! I decided to rivet the inner ribs to the spar first before riveting the skin. I will need to go on a diet before starting the right wing. My arms are a little too fat to fit thru some ... read more
|
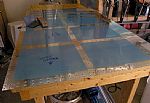
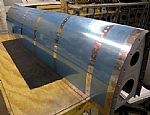
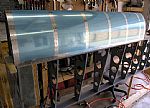
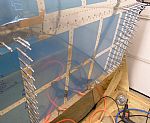
 10/12/2006 - Top skins are clecoed on, ready for rivets!
I've lined up my good buddy that helped me with the leading edge assembly to come over and bucks them there rivets. ... read more
|
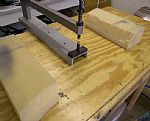
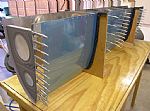
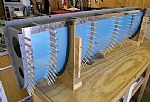
 10/19/2006 - Putting the wing cradle together
While I'm waiting to find a day when both my rivet bucking buddy and I have a evening free for riveting the wing skins, I've decided to build the wing cradle. First, I took a long look at the wing cra ... read more
|
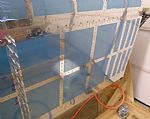
 11/11/2006 - I'm back!!
It's been tough to get my schedule and my bucking buddy's schedule together to where we can rivet the skins. I have a good portion of the inboard skin riveted. I am using a combination of riveting tec ... read more
|
 11/15/2006 - Finished riveting the inboard top skin
My bucking buddy and I finally found some time to get back on the top wing skins. Now I will start working on riveting the outboard skin. Oddly enough, the large outboard skin has the same number of r ... read more
|
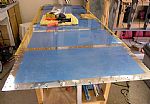
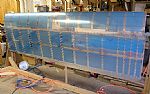
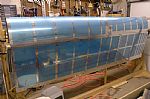 11/20/2006 - Almost there!
Thanks to Bruce and his lovely wife Kathy, this here puppy is just about done! Bruce is building a RV-7A and you can see his website at http://www.mykitlog.com/bpauley. All I have to do now is the cro ... read more
|
 11/27/2006 - Finished riveting the lap joint between the skins
My kiddo came to the rescue and helped me rivet the skins together. He used the rivet gun with the mushroom head on the skin side while I bucked from behind. I have to say that I see little difference ... read more
|
 11/30/2006 - Finished riveting the J Stringer on the left wing
Thanks to Tommy, who is building an RV-10 (by the way), the wing is all finished now and ready for storage on the wing jig at my hangar. Tommy bucked the rivets on the skin side while I back riveted. ... read more
|


